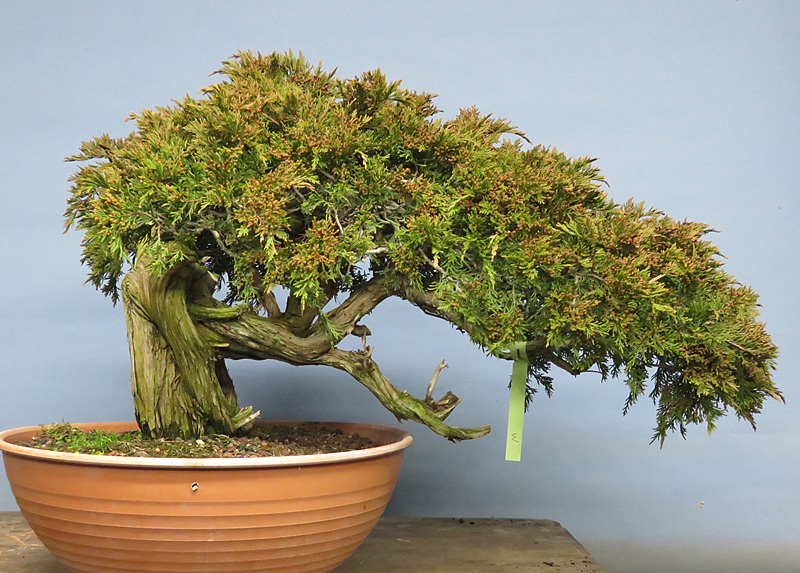
New Mediterranean Bonsai Stock
Last week we had a little delivery of Mediterranean stock. There are a good few more of these to come but for now here is a glimpse.
G.
Last week we had a little delivery of Mediterranean stock. There are a good few more of these to come but for now here is a glimpse.
G.
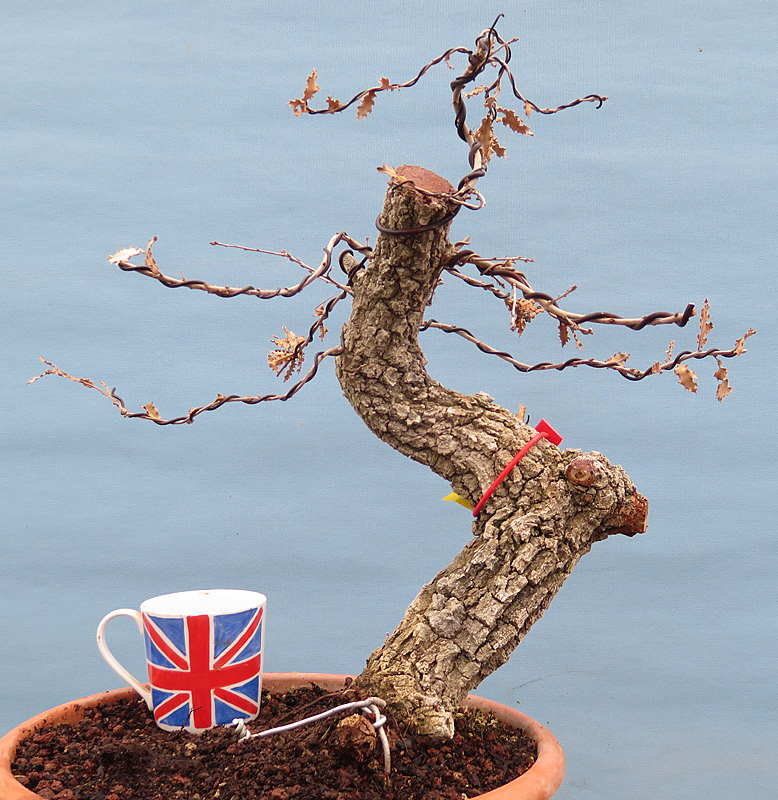
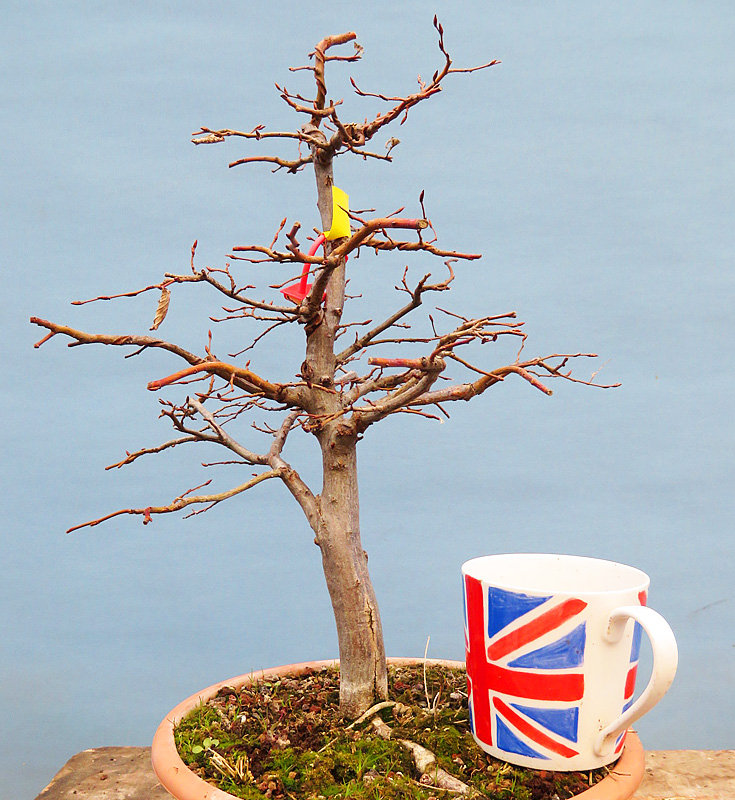
This week (13 March) I did my first re-pot of 2018. This is an interesting one for a few reasons so I thought I would share it for all to see.
This is a very old yamadori hawthorn I bought off my mentor Kevin Willson several years ago when he was having a clear out. To be fair the tree was recently collected and there was a small element of risk involved on my part but the price was right and sometimes you just have to roll the dice. The tree was planted in a big wooden box, one of my pet hates in bonsai. I bought the tree back to the nursery and stood it on a bed of gravel in full sun.
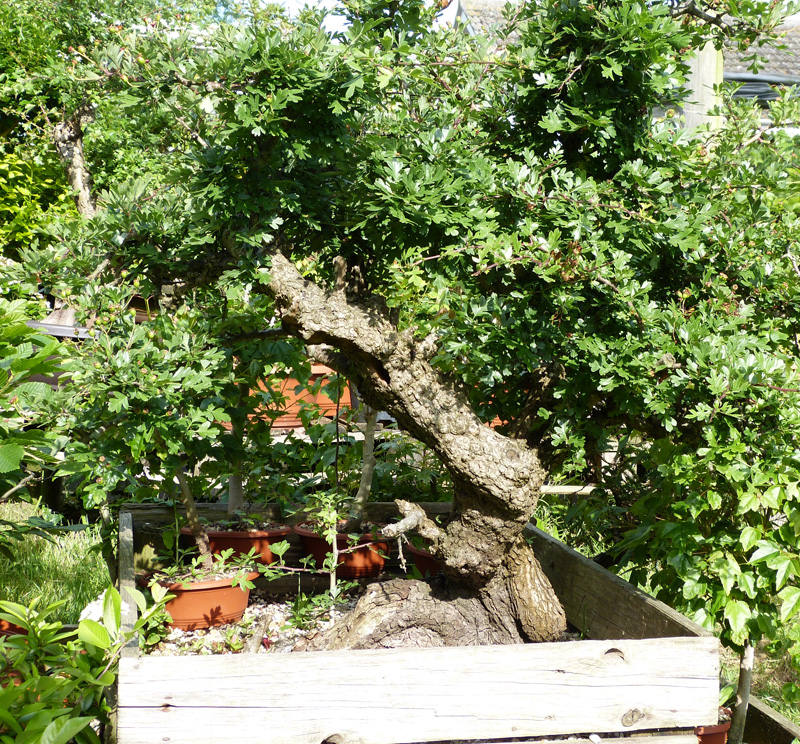
Summer 2017. Big glossy leaves & massive growth everywhere. All is well.
The key to dealing with yamadori and particularly hawthorns is to be able to read the tree so you know when it’s possible to take the next step. Too early and the tree will either die or be set back, possibly years. Too late and you are getting old and valuable opportunities will have been missed. So, this tree did nothing much the following summer, it leafed out Ok but these were looking very sorry for themselves by mid summer, no second break and no extension growth. Combined, that’s a sure sign an old tree is struggling with a lack of vigour and too few roots. No fertilising that year and very little watering as the soil was not drying out significantly. All signs you have to wait!
Next year (I would assume 3rd year since collecting) the tree leafed out well in spring and by mid summer the leaves looked half decent and I got a couple of one inch extensions but still very little watering was required. Time to apply some more patience. In all this time the tree did not move a single inch and the box was quickly falling to bits so I just kept piling the soil back on top of it.
Now in the third year in my care and spring bugs were looking much better than in previous years, fatter and raring to go much earlier in the season. By mid summer I had too many four inch extensions to count, a second break and the leaves were twice the size of the previous year. The leaves also remained active and viable until leaf drop in autumn. It’s evident the tree had spent the entire previous season making roots rather than top growth and my patience was beginning to pay dividends.
With results like I had seen the previous year I would hazard a guess that ninety five percent of folk would be ordering a bonsai pot for the coming season and that’s why most ancient hawthorns never become bonsai. It’s true you can largely do what you like to the top of a ‘thorn but the roots need to be treated with ‘kid gloves’. The older a ‘thorn the slower it will be to recover and if you jump in too soon your world of hurt will extend far beyond the pain of a few thorn pricks. So here is what you need to see an old hawthorn yamadori doing before you go and get all mucky….
Spring 2017 duly arrived and my hawthorn was facing a very promising year ahead. It leafed out very early, the leaves were all an inch long (a quarter of that when we started) super shiny, deep green and held up high and proud like a Cruft’s champions tail. There was a decent show of flowers, the soil was drying out almost every day and by August I had two foot extensions (from the six months growth) as well as four to eight inch extensions everywhere. The tree was pushing new strong fat shoots out of everywhere including the big roots just under the soil. I even treated it to a couple of applications of Green Dream Fertiliser. The final indication all was VERY well was a complete lack of mildew or pest problems and beautiful strong autumn colour very late in the season. In my experience if your hawthorn is not growing like this it’s at best just surviving. I consider these signs and this level of growth to be an absolute minimum required before ANY work is done on a hawthorn, especially root work.
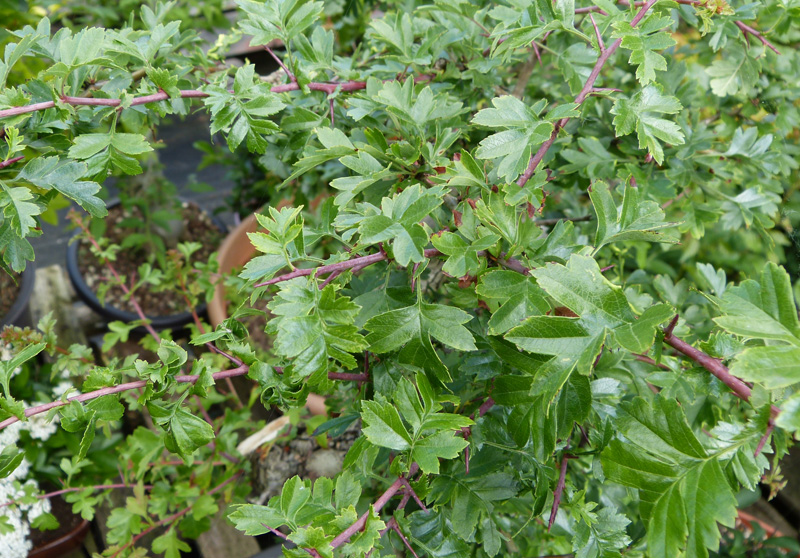
Big, thick shiny leaves and extension growth everywhere. Things were looking up.
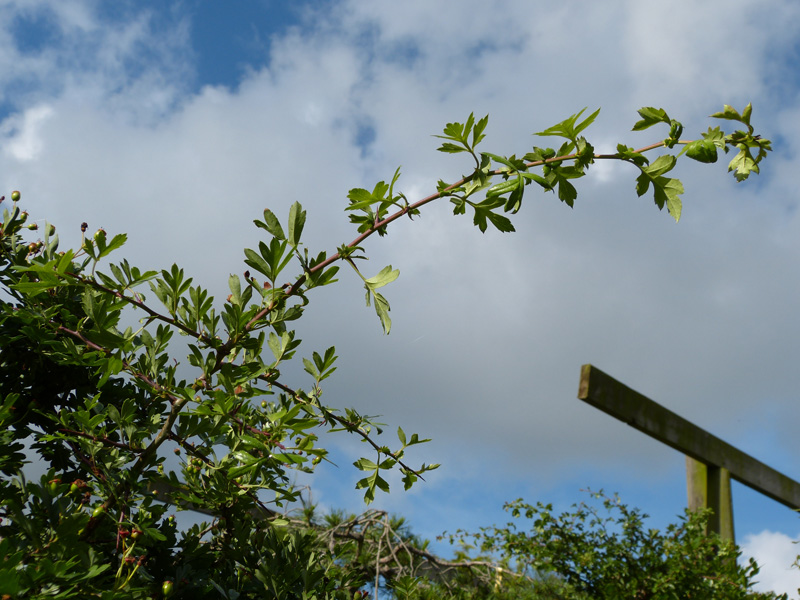
About a foot and a half of extension in a couple of weeks!
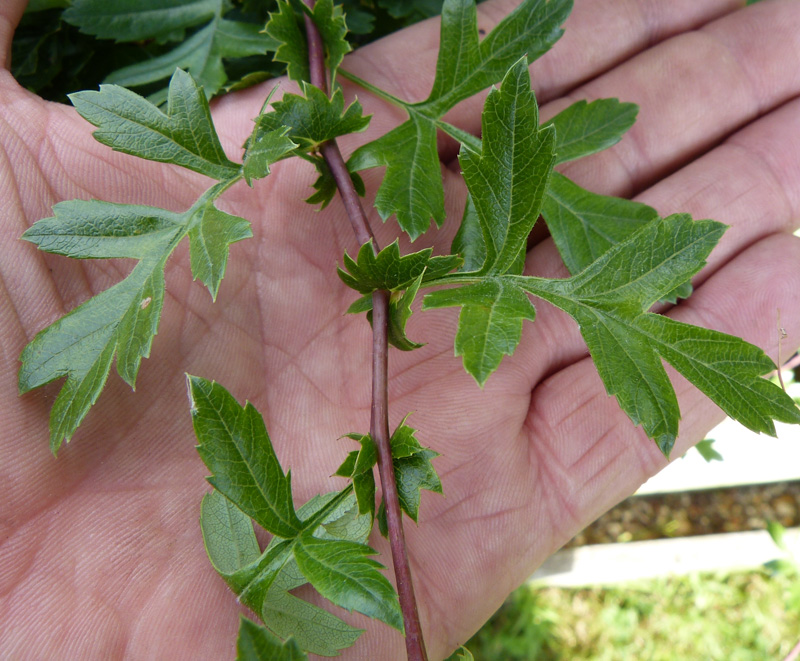
Everything you need to know. Big leaves and getting bigger as the shoot extends, deep green, all perfectly formed and most importantly a deep shine. Thick even red shoot that does not taper.

Last summers growth from a bud. Those roots were doing their job.
Fast forward to March 2018 and i would RATHER leave the tree for another year just to be sure but the box has now completely fallen apart and I have to get this thing moving, I am after all running a business here. I have sat on this for five years now and looking ahead there’s a long way to go before I can recoup my investment. I am confident in the trees ability to withstand having it’s roots disturbed but always approach yamadori hawthorn with an air of trepidation and respect borne of many failures.
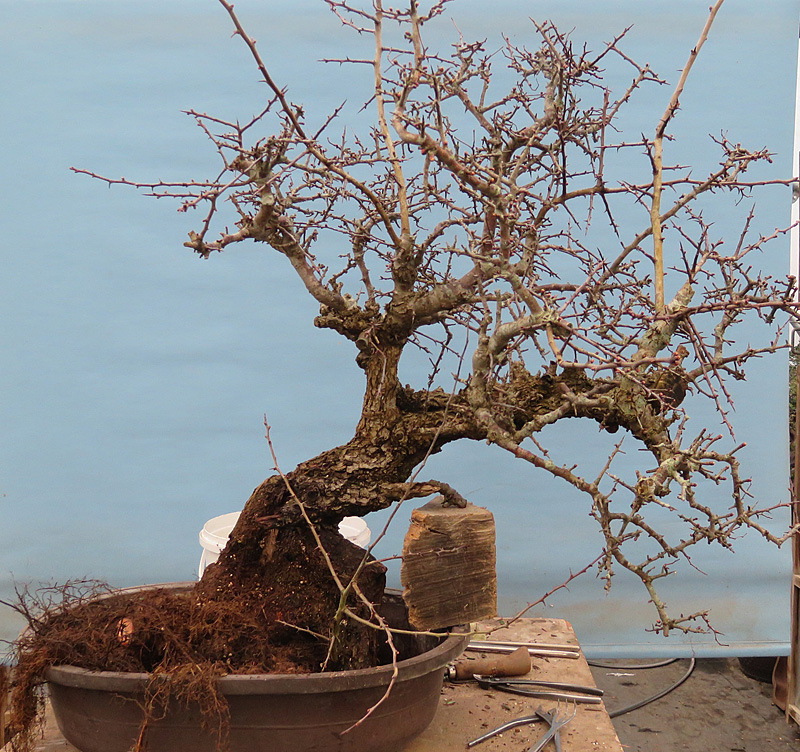
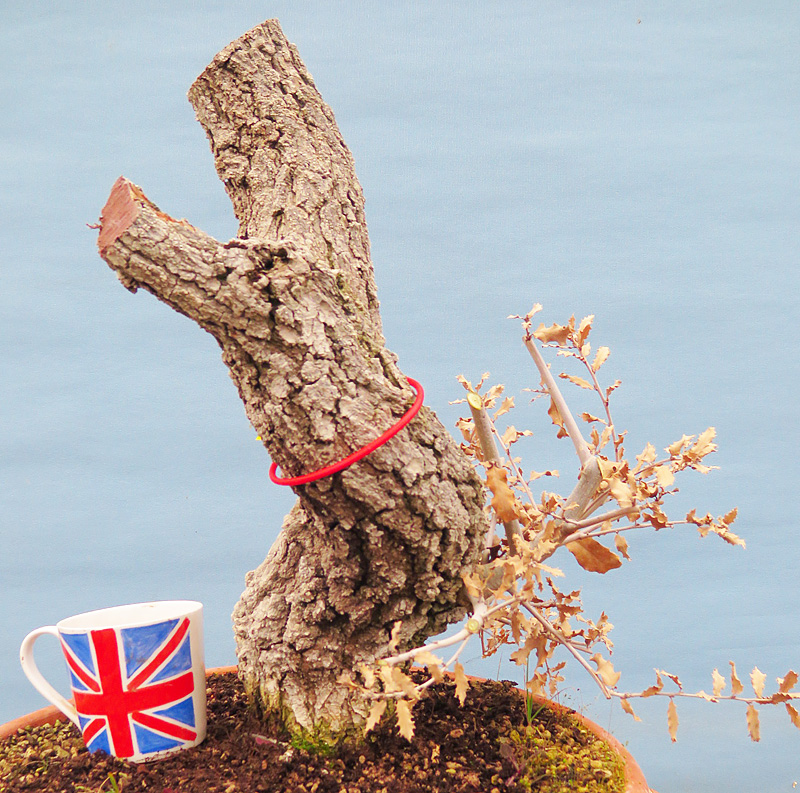
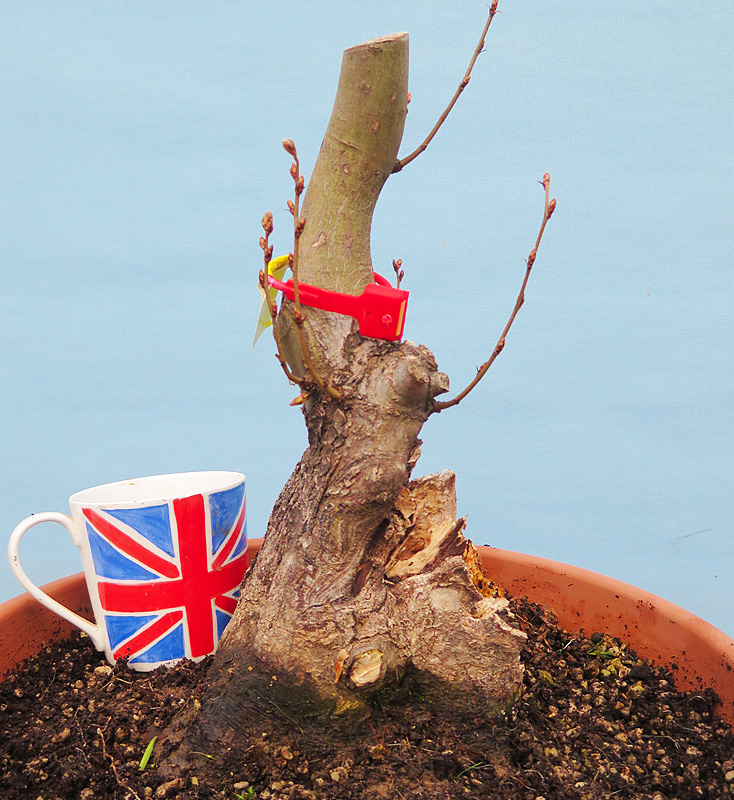
First issue i had was choosing my time. Large swelling buds and easily visible tiny white root ends everywhere indicated the time was right. EVERYONE re-pots bonsai too early and even at this stage I could have waited at least three weeks more but I have a lot to get done and so have to take liberties sometimes. Second issue was moving the thing which is part of my issue with boxes. The tree was rooted into the gravel bed for a start so I removed as much soil as i could and then with many hands and a shovel managed to get the tree with it’s rootball intact onto a cart. If the rootball of a hawthorn falls apart it will often strip away lots of fine feeder roots and those are the most important to keep. When collecting, even a massive tree will be kept alive by a small teacup of root which could easily be removed with a brush of the hand.
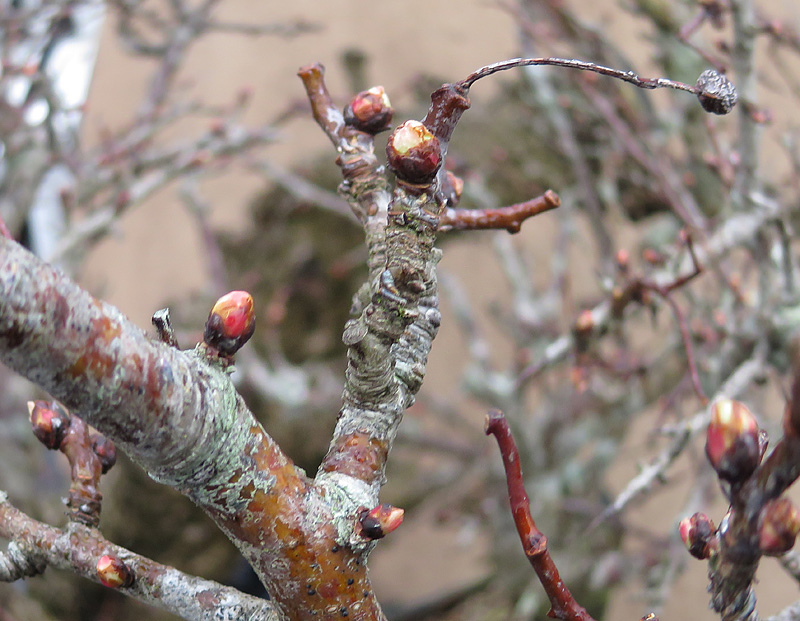
Still a bit early but I have lots of other trees to do. When the buds over the ENTIRE tree look like this it’s time to jump in.
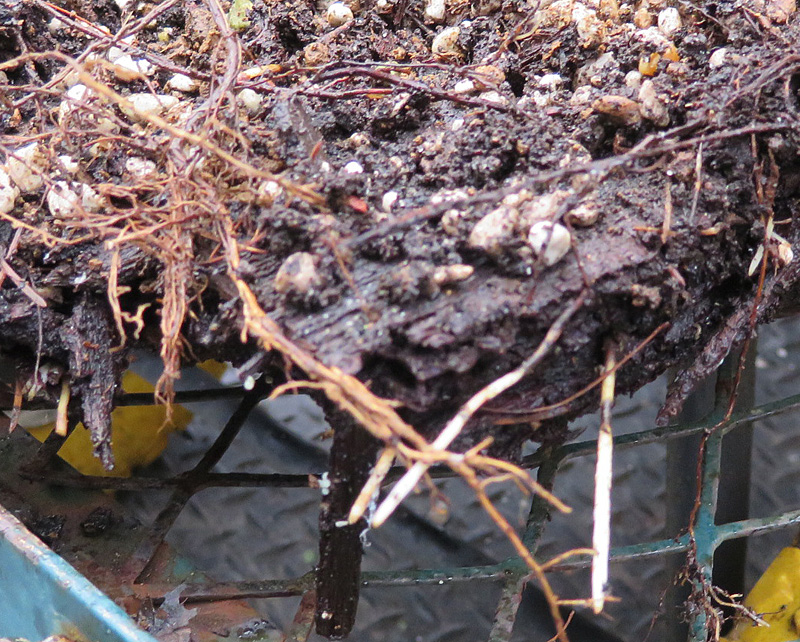
With some roots exposed white tips indicate we chose the right time.
Into the workshop with the remnants of it’s box.
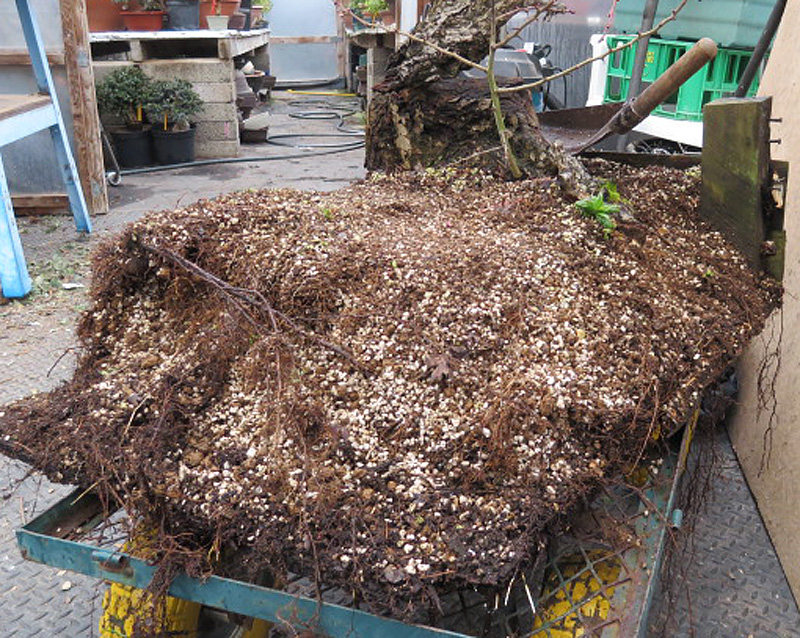
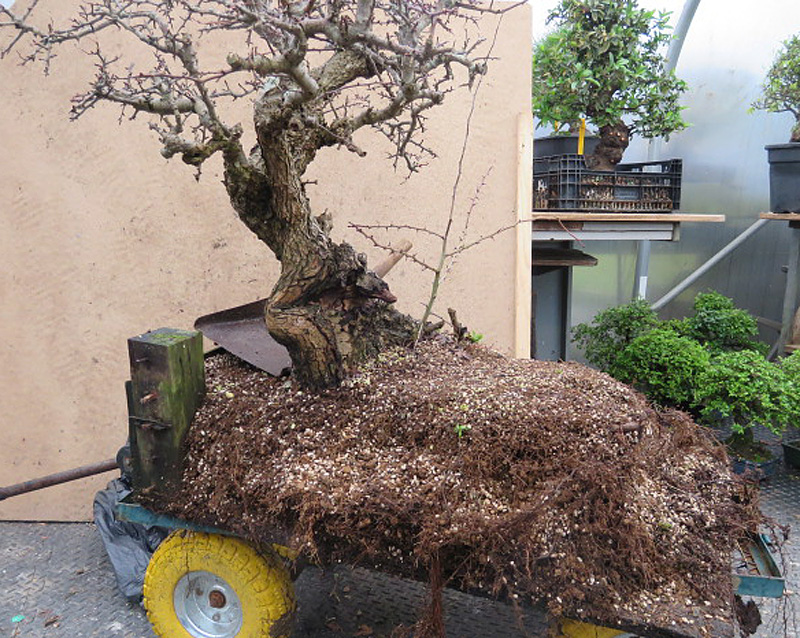
A lot of root and a lot of weight to deal with.
Once in the workshop I raked out as much as I could to get rid of the weight. Turning the tree on it’s side let gravity help me along a bit. Once free of the remnants of the box and with almost all the weight gone I was able to wrap and strap it and suspend at a convenient height for working. With delicate rooted large trees this avoids wrecking valuable growth rolling it around on a bench. With a little slim stick I was able to fluff up the roots and shake out all the remaining soil. I NEVER wash the soil off the roots of yamadori, it carries away too much of what the tree needs, don’t be lazy and leave the hose until after. Once clean I could see just how much root the tree had developed and from what I saw i would guess about ninety percent of this had happened since it was collected judging by the small area of field soil, collecting hawthorns, particularly in rocks is tough.
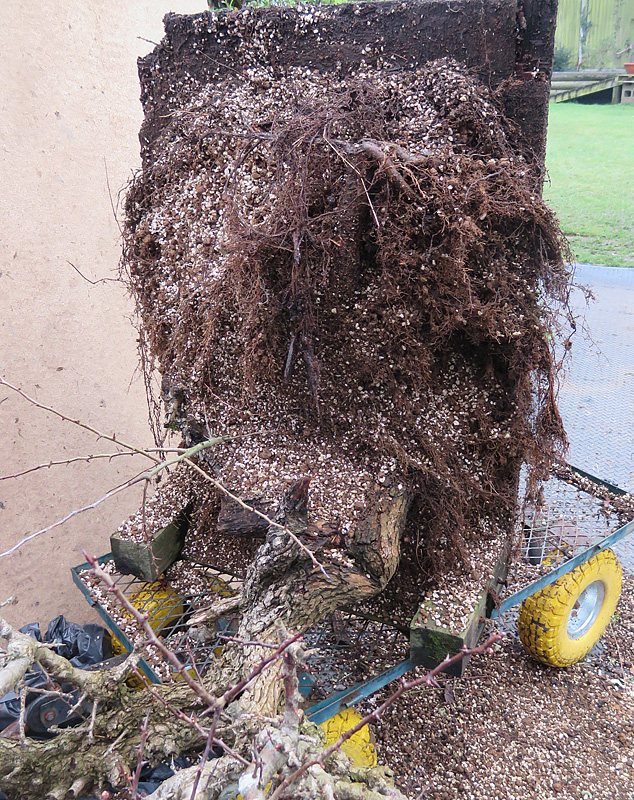
Up-ended, gravity helped me strip most of the weight of soil away
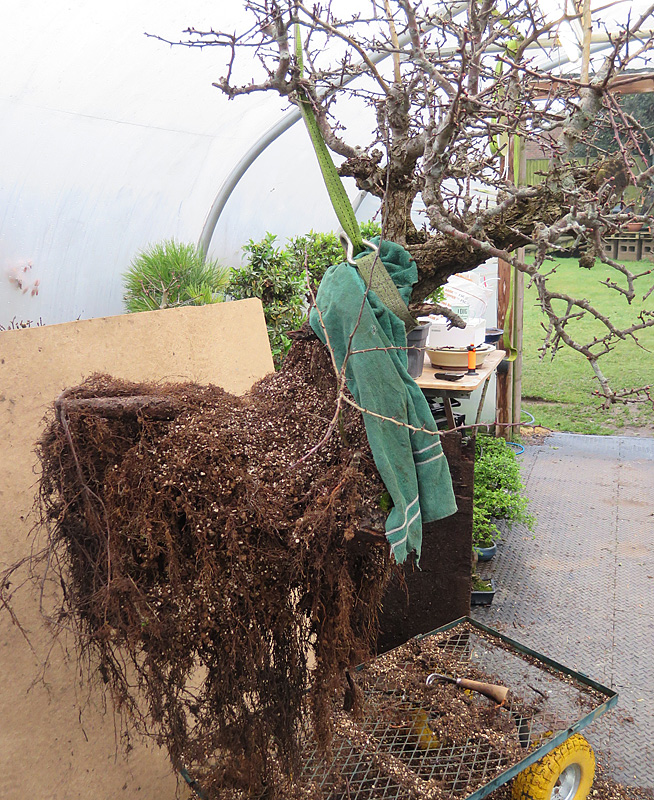
With the weight gone and the remaining rootball secure and tight I could suspend the tree in order to work without causing excess damage.
Looking at the exposed root system it was evident this tree was never going to fit into a bonsai pot or even the oversize training pot I was hoping to use. Time to get pruning and this is where it often goes wrong for folk potting yamadori for the first time. These trees are normally old and respect needs to be paid to that fact. In an ideal world what we want is to gather up ALL of the root and put it into it’s new container with new soil so the growth cycle it’s taken so long to build up can continue. Forget about big flat nebari and everything you learned about re-potting bonsai, this is NOT bonsai, survival and future development is the order of the day. “Bonsai” root pruning is something that comes much later and where hawthorns are concerned MUCH later.
Now that the entire root system is laid bare I could easily judge what I had to work with and the only real problem was a long thick root sticking out the back about a foot long and with a massive amount of root on it’s end. There was no way this was ever going to go into a pot of any reasonable size. By isolating the roots this carried from the rest I was able to judge just how much of the precious root system I would loose if I cut it away. Based on experience I was not entirely happy but considering the current strength of the tree I felt there was only a small degree of risk and so away it went. I did manage to find a couple of small side roots below which I cut, this should mean the remainder of this root stays alive and ensures I don’t lose an important strip of bark or live vein further up the tree. NO other roots were pruned in any way.
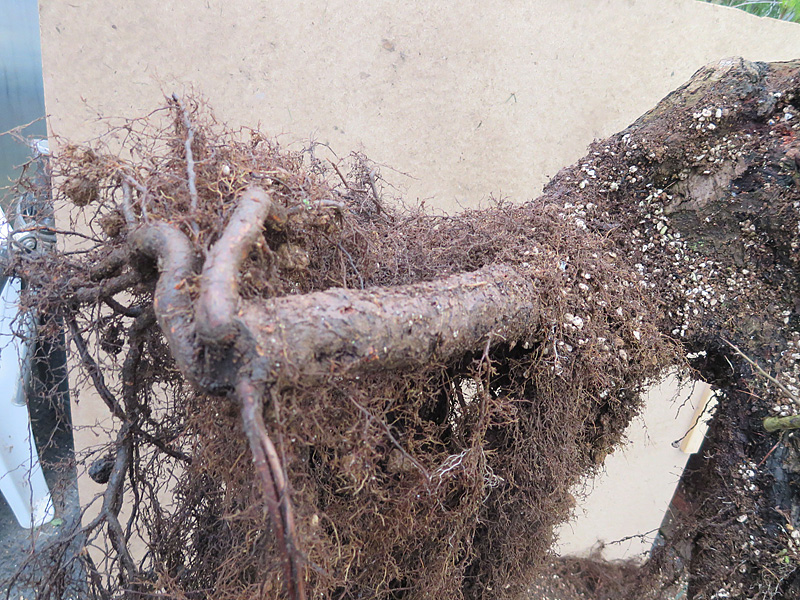
This was never going to go in a pot but on balance it was possible to remove most of it.
With my big prune out of the way it was evident this would now go into a nice small pot but, over the years, most of the big problems I have had with bonsai have been down to small pots and so i rummaged around to fine a pot that was too big. I will say what follows with my last breath…. ONLY EVER PUT BONSAI IN BONSAI POTS – Putting any plant into a bonsai pot WILL NOT, EVER, make it a bonsai. Putting ancient yamadori like this into a bonsai pot, at this stage, pretty much guarantees it will NEVER, EVER, EVER…… become a bonsai tree. I estimate another fifteen years before this needs a bonsai pot but today it’s very important to begin the process of developing the root system (structure and size) it will need when we get there. I turned up this huge mica bath tub that had been cluttering up the greenhouse for years, it’s significant depth and large size was just perfect and a great improvement to mobility over that old box.
Old mica bath tub proved to be just right.
One of the most important factors in potting a tree like this for the first time is to secure the tree properly. It takes a hawthorn years to make a lot of root and so wiring the tree into the pot to ensure it is steady is absolutely vital. Most folk never really master this particular art. It’s important to have good thick wire which needs to be pulling the tree downwards at an acute angle and this needs to be pulling down on something strong like a thick root. This really needs to happen in three places around the tree for maximum stability. Conveniently mica pots can easily be drilled with holes so this was an easy task in this case. Hopefully the picture shows what’s required. DO NOT SKIP THIS STAGE.
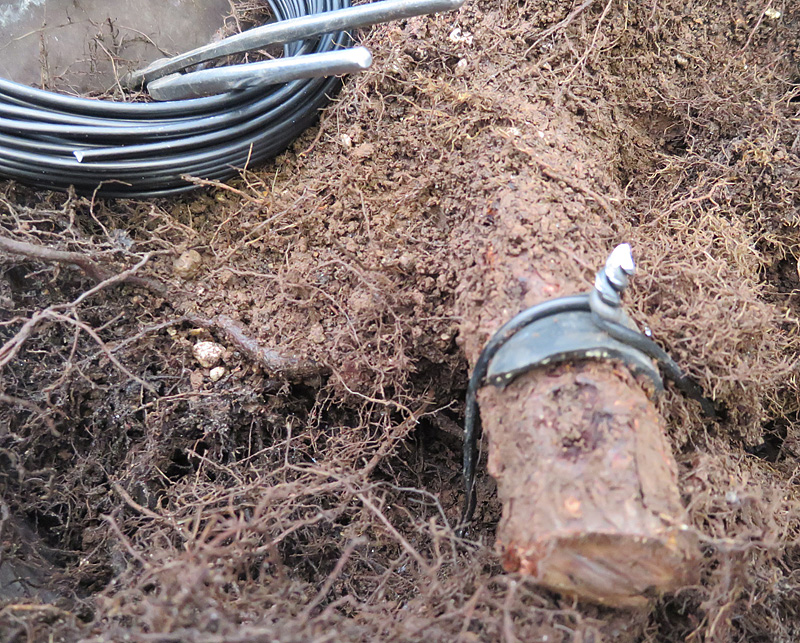
Three of these properly constructed and your tree will stay put.
Finally it was time to put some soil in the pot. As far as hawthorn go an alkaline mix is needed and this should be constructed from ingredients that will not break down over the long term seeing as hawthorn, particularly in large pots, don’t need to be re-potted above every ten years. Don’t use akadama in the UK, the frost will kill it in a few years and when you come to re-pot it will take most of your root with it. Our No 2 Bonsai Soil Mix has proven very successful with hawthorn over the years and in this case the addition of about 10-15% Pumice means this root system will be good for at least the ten to fifteen years this tree will take before it needs that bonsai pot.
Have a look at how Kaizen Bonsai soil mixes help root development for hawthorn.
Just one important pointer in relation to getting the soil into the pot. Add the soil slowly and use a slim stick to agitate the roots side to side in order to allow soil to get between them. We want a nice mix of soil and roots not a flat matt of roots squashed together with soil laying on top. Almost everyone I see re-potting bonsai uses a stick and stabs at the roots like a pshyco’ knife attacker. Move the stick side to side, not up and down. A lot more soil will go into the pot and the roots will remain in tact. Next use the stick, slid down the side of the pot to pull the roots inward slightly in order to leave a thin layer of soil between the pot and the roots. Roots hard up against the side of the pot will just trap water and encourage rot in the days prior to regrowth. Lastly a light watering, and I stress LIGHT and the job is done. No need to flood the pot, that’s old bollocks carried over from the practice of puddling in that gardeners do.
The last job I did to this hawthorn was a light prune to get rid of a lot of what I definitely didn’t need for the coming season. No point in growing lots of material where I won’t be needing it. It’s important not to overdo this, every bud produces solar panels that the tree really needs at this point. Don’t be tempted to get into a styling session!
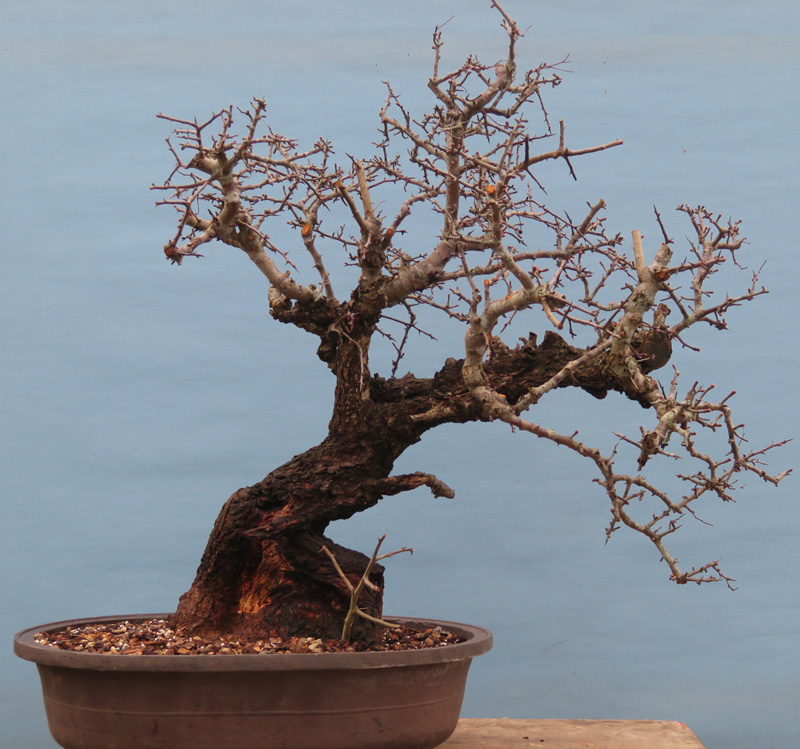
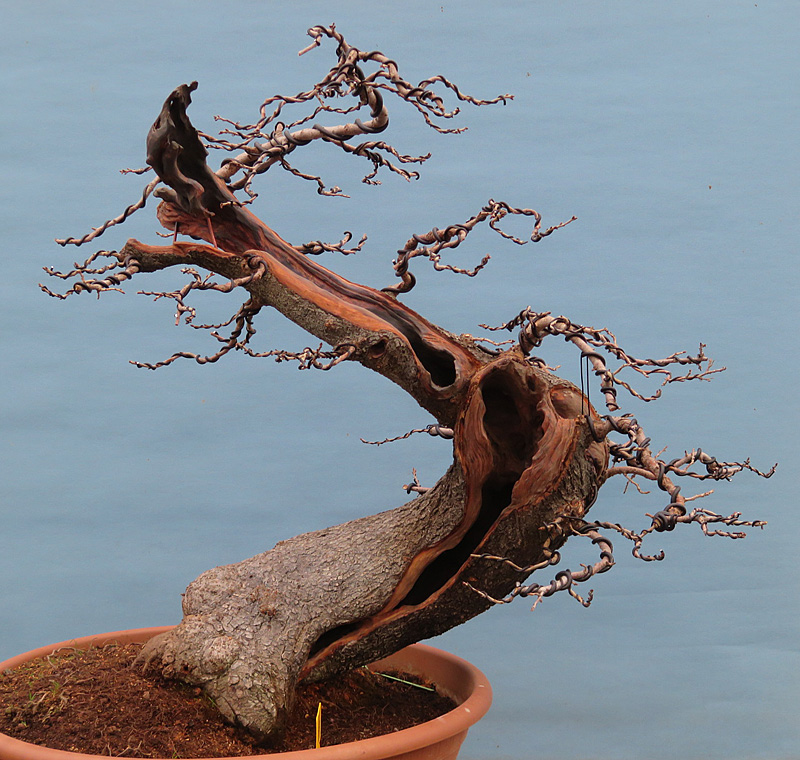
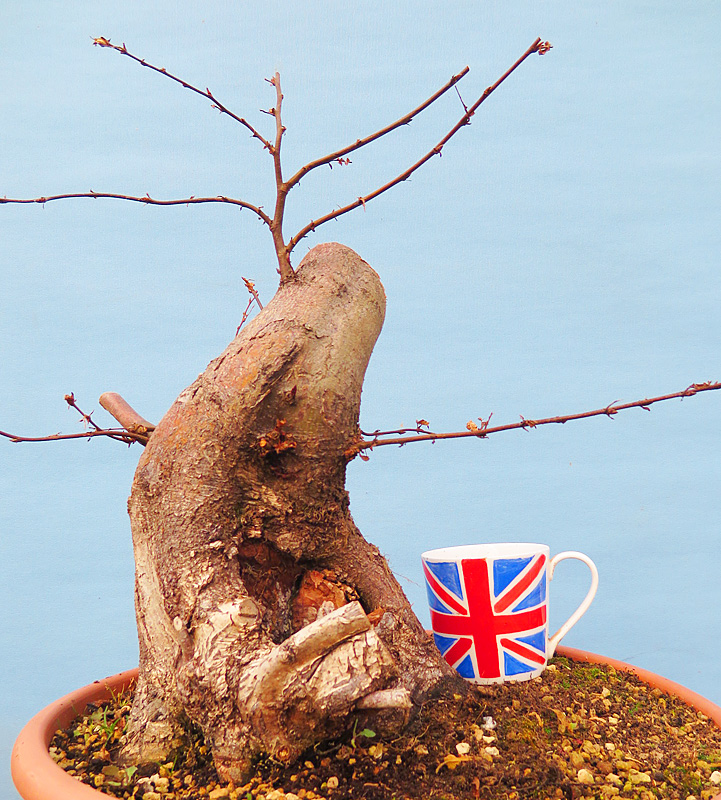
All finished and pruned ready for the season ahead. This will probably end up being the front.
Finally I would like to talk about what you do with a tree after re-potting. Where the tree is placed is important and largely mis-understood. This tree was out in an exposed spot in full sun. After the re-potting work it might seem a good idea to put the tree in the greenhouse but this will just bring the top on too fast, before the roots have had time to regenerate, it also creates a potential problem when the tree is finally returned to the great outdoors as the leaves will have developed to suit an entirely different atmosphere. Most folk would place the tree in the shade which is absolute nonsense, particularly in the UK. The only way this hawthorn is going to recover and resume normal growth is by initially using the energy it has stored up in reserve thanks to it’s recent strong growth and ultimately from the energy it creates from sunlight. Putting it in the shade will reduce it’s light exposure to a massive extent and once the leaves do emerge it will be left struggling. By all means put the tree in a SHELTERED spot out of the wind but this ABSOLUTELY MUST be in full sun (such as it is in a typical British spring). I simply put this hawthorn right back in the same spot as before, that won’t mess with it’s internal clock, it’s got all the light it will need, a hawthorn is not effected by wind exposure and the temperatures are perfectly suited to where it is today because that’s what it had yesterday. There is no need to move a hawthorn about after re-potting, even if the temperature drops drastically so long as you didn’t water-log that soil. Hawthorn is tougher than a junk yard dog, at least a healthy one is. The joys of working on a strong healthy tree are entirely worth the long wait to get there in the first place.
Unless someone manages to prise this out of my hands I hope to bring you an update next year.
Graham.
March 2018
This week we took delivery of over 250 new trees. Lots of nice Japanese bonsai as well as Chinese, Indonesian and European materials too. I have tried to take a few snaps as I went through all this, sorry they’re not up to the usual standard but hopefully it gives an idea of what we have. This is, by no means, all we have coming but it’s not a bad start. There’s two more deliveries of yamadori planned within the next few weeks. Watch this space.
Next week i’ll start getting all this ready for sale and hopefully before the autumn it will have all been listed on the web site. Now that horrible weather has gone we will start re-potting in earnest within a couple of weeks. This bonsai lark never stops !
G.
Way back when I started messing with bonsai I suffered serious bonsai envy when looking at the bonsai books I got from the library. The thing that impressed me most was the beautiful junipers I saw from Japan. Their stunning deadwood, contrasting red live veins and awesome foliage left me weak at the knees. Being in straitened circumstances I figured I would just have to content myself with admiring these beautiful trees from afar.
Part of the problem was that in UK bonsai the only source of good junipers at the time was from Japan. Most of them were eye-wateringly expensive and being nursery produced were also not exactly exciting. I remember when my best mate and I both managed to procure an almost matching pair of small Japanese needle junipers with good live veins and deadwood. We were both so excited we were ready to pass out. Being a couple of ignorant hicks we managed to kill the trees in pretty short order.
After that the only junipers I had were massive garden varieties with naff foliage or the ubiquitous Blaauws variety from a local grower. I did manage to produce some half decent bonsai from that material, in fact I still own one of them, but I was a very long way from my dream of a beautiful yamadori juniper like I saw in those old books.
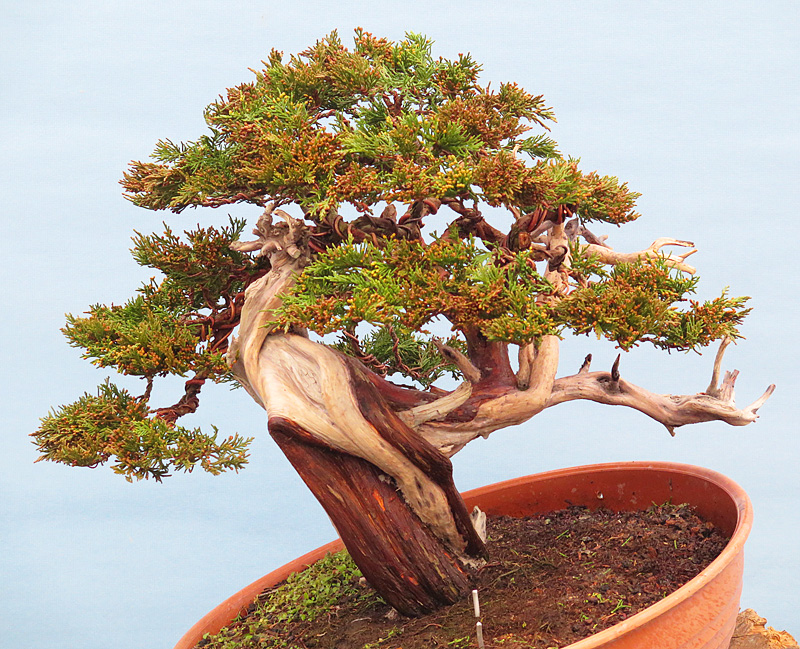
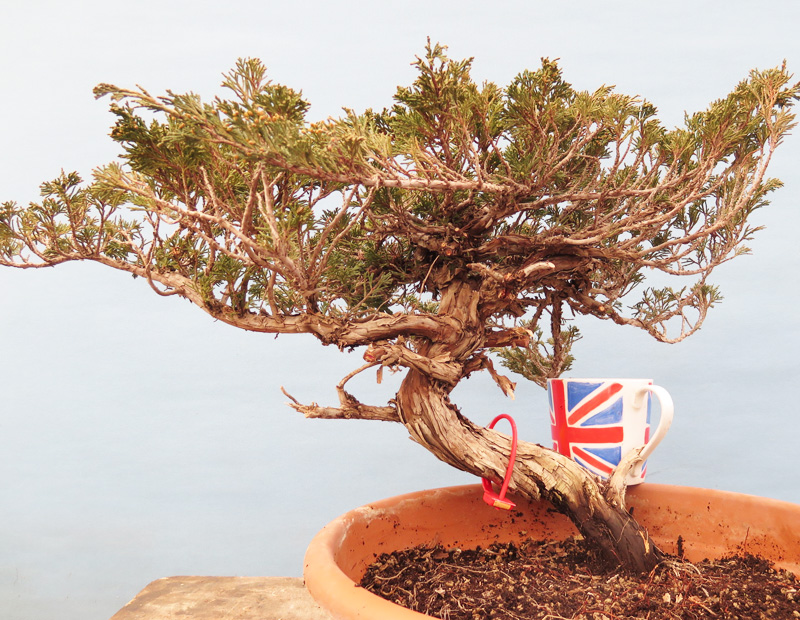
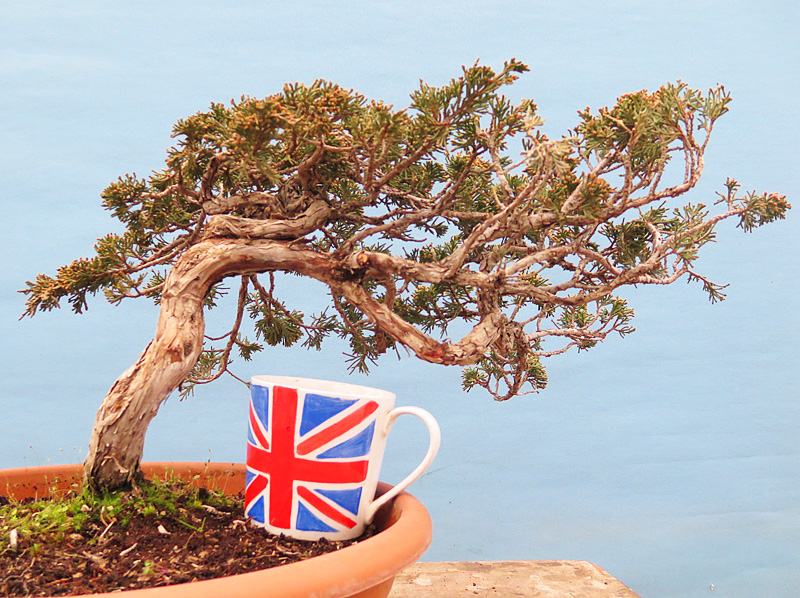
Fast forward twenty five years and everything has changed. My circumstances have improved but those old Japanese masterpieces are hard to come by these days and command telephone numbers when they do become available. However my dreams have come true many times over thanks to the availability of the wonderful Spanish sabina juniper. I have lost count of how many of those beautiful gnarled twisty trees have passed through my hands now. The trouble these days is not the procurement of a wonderful tree but finding the time to do it justice. Junipers are extremely time consuming to work, particularly when it comes to first work.
If you have watched any of our videos about working junipers, read between the lines and you will see just how much time and effort goes into getting a sabina cleaned up, wired and styled. By and large we don’t do much work on our yamadori junipers, since I have to add an hourly rate to the tree afterwards the numbers just don’t add up. However this week I fell under the spell of one of these great trees and whipped it into shape.
Styling a juniper pretty much starts and ends with wiring and the better and finer the wiring the better the finished result will be. I particularly hate wiring junipers, my stubby fat fingers don’t lend themselves to fine work but sometimes we just have to knuckle down and get on. The only thing worse that wiring a juniper is wiring a juniper at five degrees below freezing, which it’s been this week.
This juniper has been sitting around now for a couple of years and it was just at the point where, if it were not worked, it would begin to go past a point of no return without a brutal haircut. So a few wire brushes and a half pound of copper later and here it is…….
G.
Spanish sabina on Saturday, in from the snow.
Friday afternoon. It’s been a very cold week, work progressed slowly! Sorry the picture’s not great my poly tunnel is covered in snow.
Over the next few weeks we have our largest influx of bonsai ever arriving on the nursery. By May we have close to £75,000 of bonsai trees and yamadori arriving right here. Today, despite the weather my first stock arrived at 7am. To be fair this is probably the worst of what we have bought and much of it we have long term plans for but because bonsai moves so slowly I have to be thinking several years ahead all the time. There is some very good value here too considering how hard it is to find small material suitable for training as bonsai.
Please don’t bug me about prices. By summer some of these trees will begin to make their way onto the web site. I have over 500 trees on the way as well as 450 existing trees to re-pot once the weather breaks and won’t have time to be messing with emails, sorry. These days selling bonsai is very easy, the hard bit is getting it in the first place and I have to work a lot harder that I used to in order to keep our benches full.
Next week Japanese trees arrive 😉
Meanwhile if you have any trees available for sale or exchange, particularly large numbers PLEASE get in touch.
G.

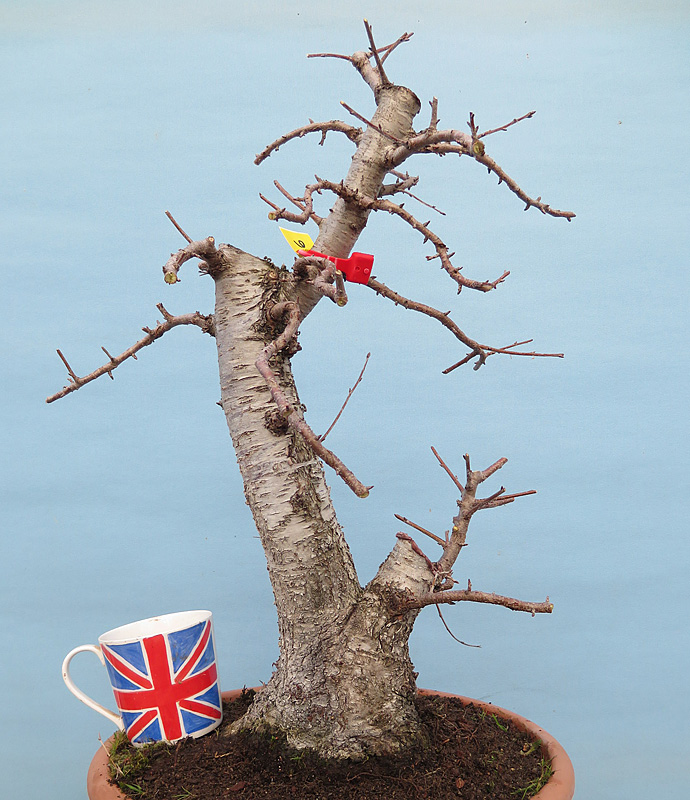
Hawthorn
Quercus faginea
Quercus faginea
Anyone have any idea what this is?
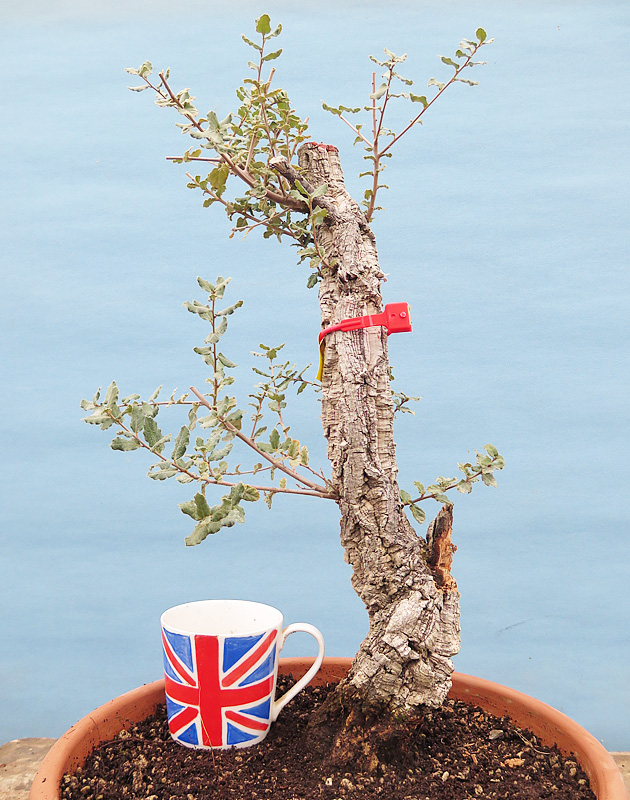
Quercus suber
Prunus mahaleb
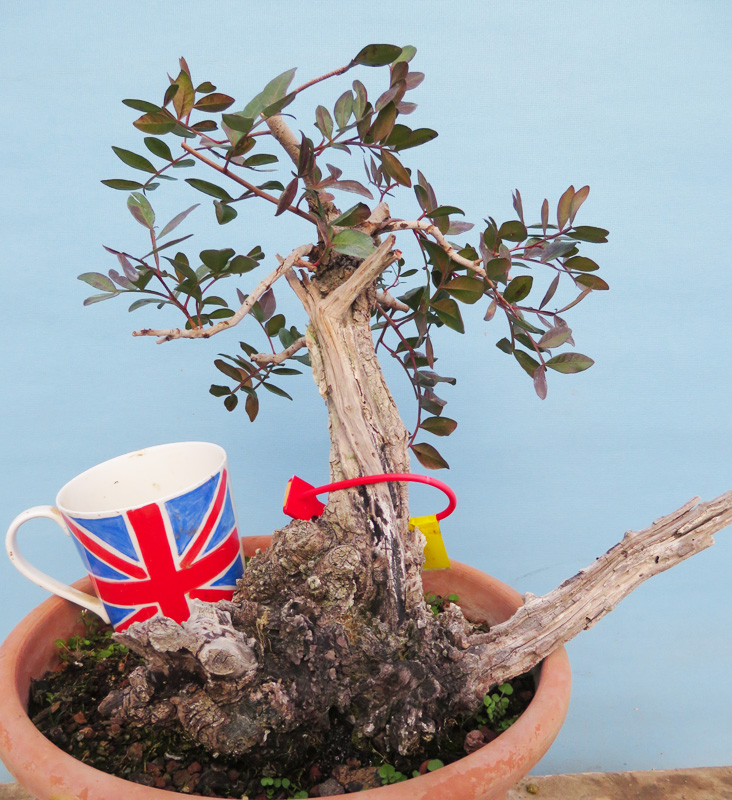
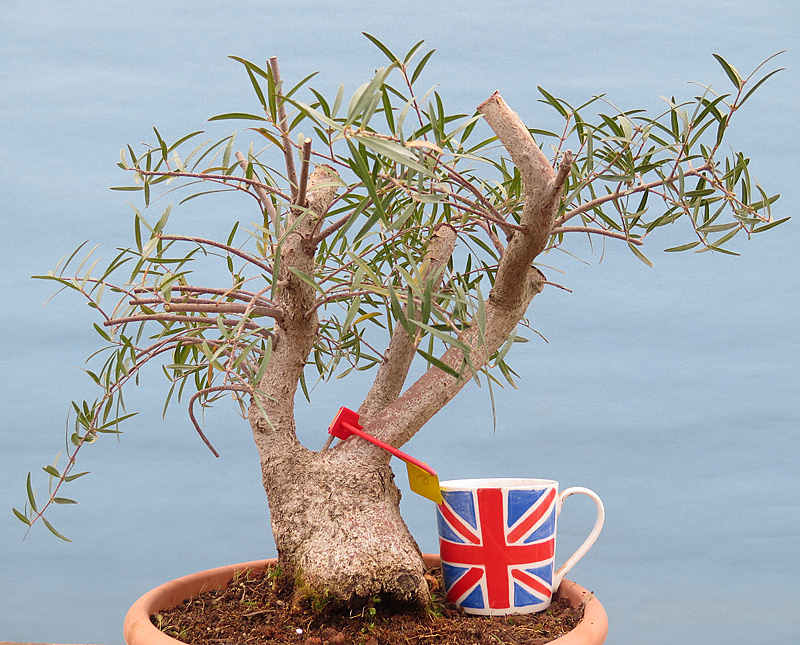
Pistacia
Carpinus betulus

Carpinus betulus
Carpinus betulus
Carpinus betulus
Carpinus betulus
Carpinus betulus
Quercus faginea
Ulmus minor
Prunus spinosa
Prunus spinosa

Prunus mahaleb
Quercus faginea (mostly buried)
Juniperus sabina
Juniperus sabina
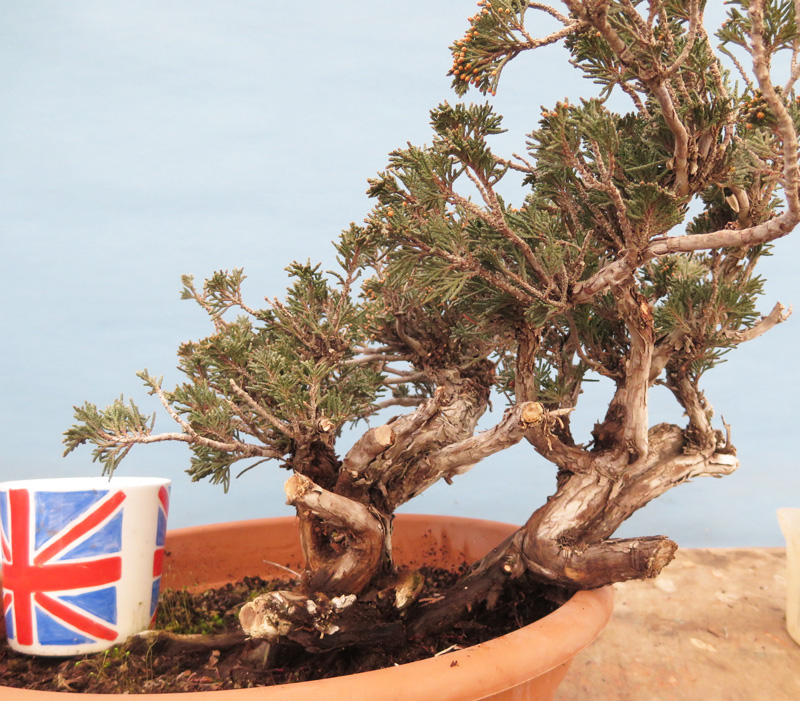
Juniperus sabina
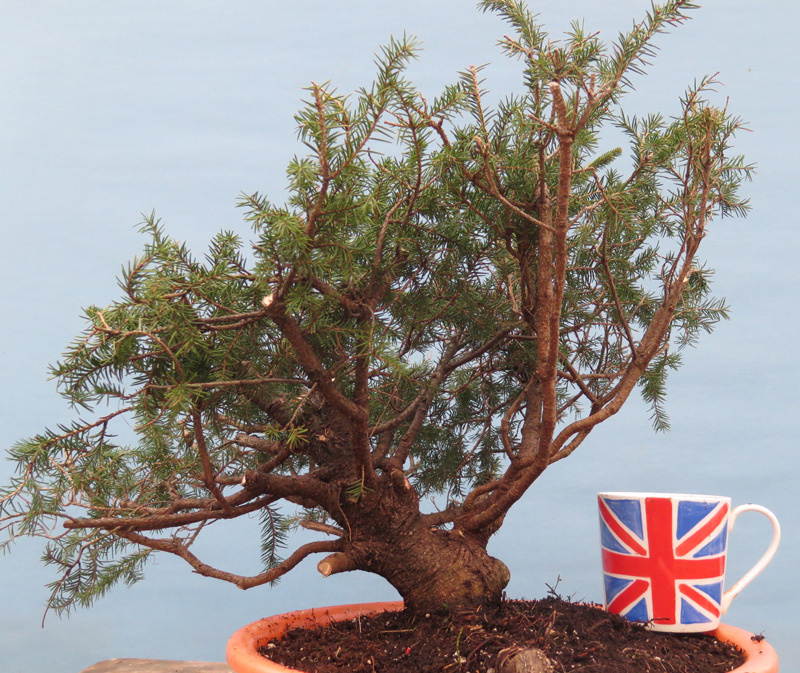
Picea abies
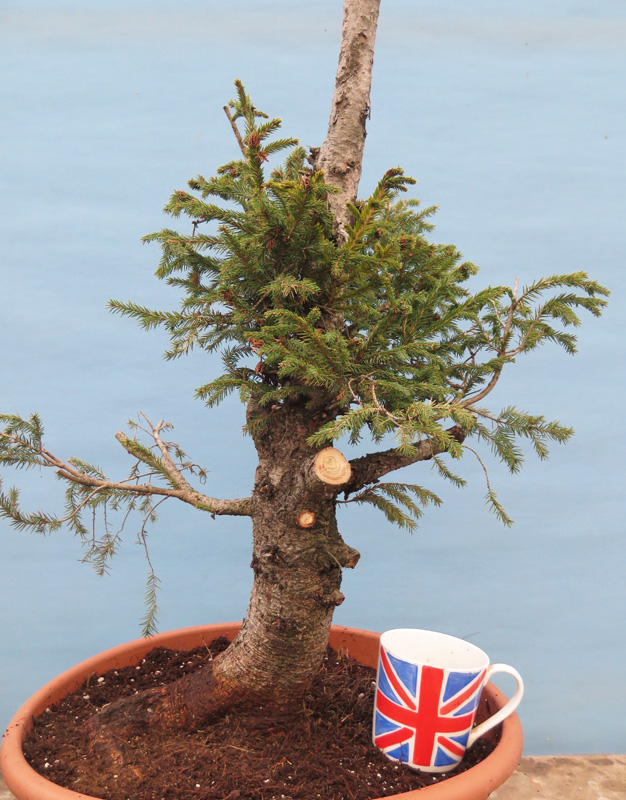
Picea abies
Tamarix
Tamarix
Quercus faginea
Massive carpinus betulus raft.
Ever since I was a toddler I have been something of a loner, definitely NOT what you would call a team player. Most of my early years in bonsai were spent entirely on my own, no mates, no bonsai clubs and nobody pointing me in the right direction. The net result was a whole host of bad experiences. I can confidently state I know a thousand ways to fail at creating bonsai trees. It took me ten years to even start to figure out what I was doing, some would say I haven’t figured it out yet but I never really bothered about what other folk thought.I know when I did a good job and come the day I actually do achieve my best work it’ll be the last bonsai work I ever do since I have no interest in going around in circles.
When we start out we all make some ugly trees. Most of mine died, some I killed and a few I took out to the woods and planted them there where nobody could see them. These days, because we move a lot of trees throughout the year I have a huge number of plants coming across my bench. We get a lot of waifs and strays, a lot of abuse victims and even a few terminal cases. My log burner always has plenty to eat and the composting bins are always full. I am never shy in administering a coup de gras (1. A deathblow delivered to end the misery of a mortally wounded victim.) However one of the things I particularly hate is having to make good on other peoples half work. There’s nothing I love more than a good clean stump but putting right something that has been tickled by someone else annoys me because most of the time it crimps my style, I don’t like to be told what to do.
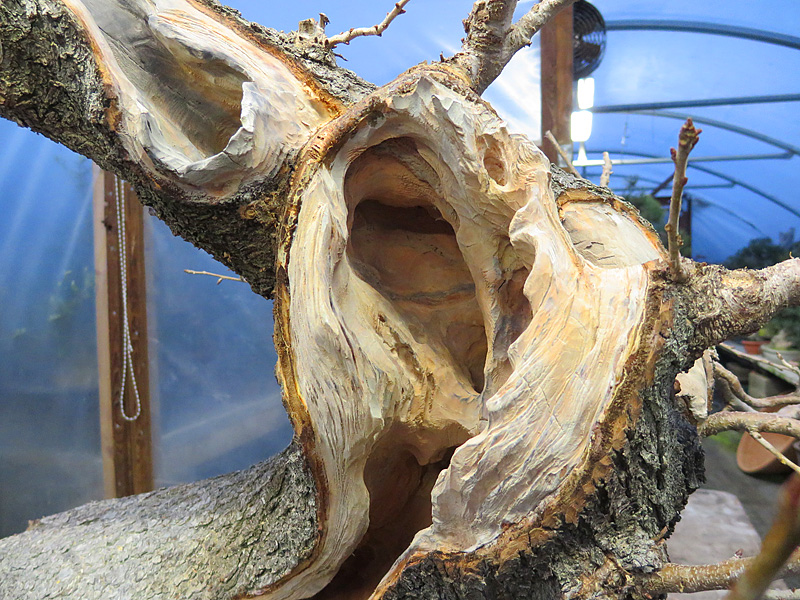
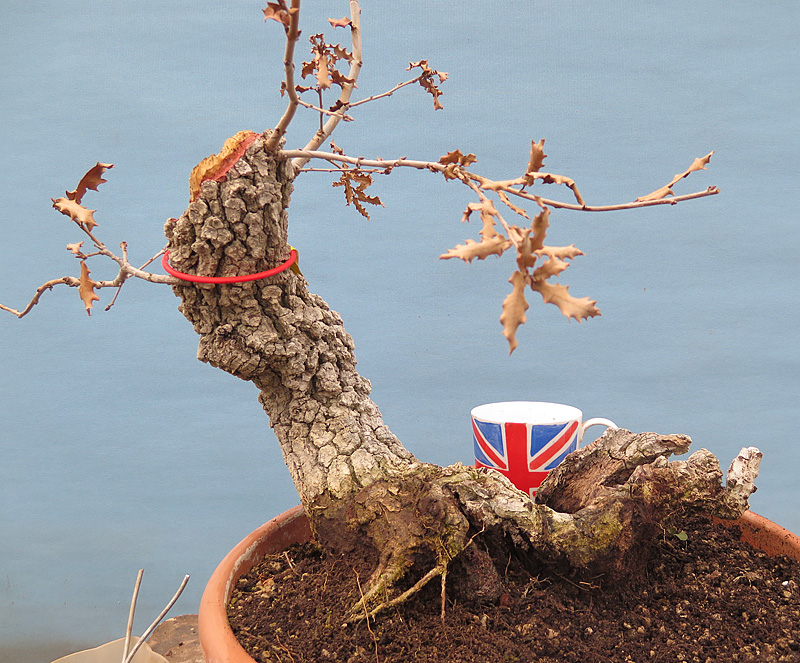
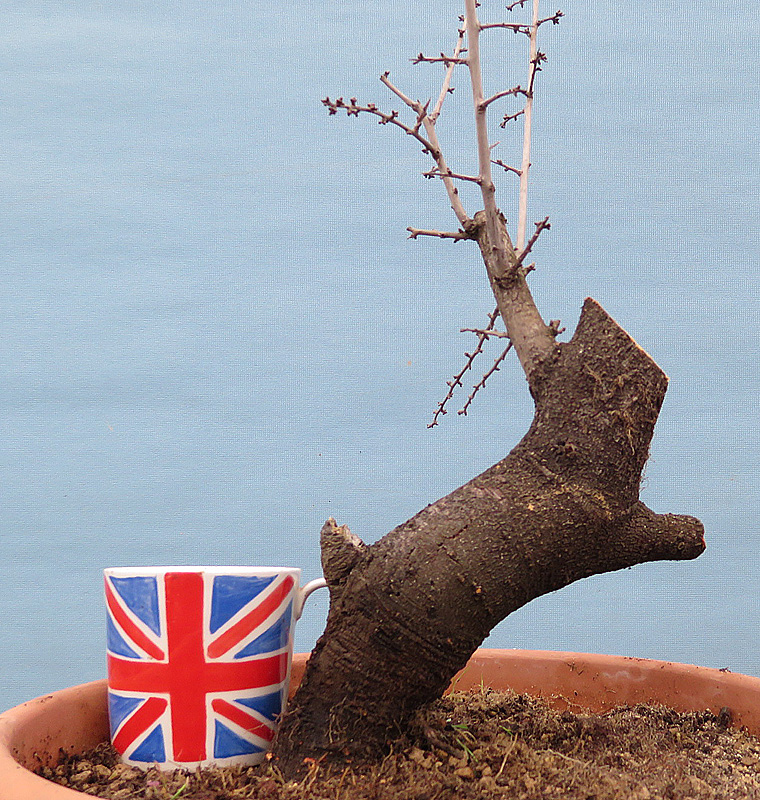
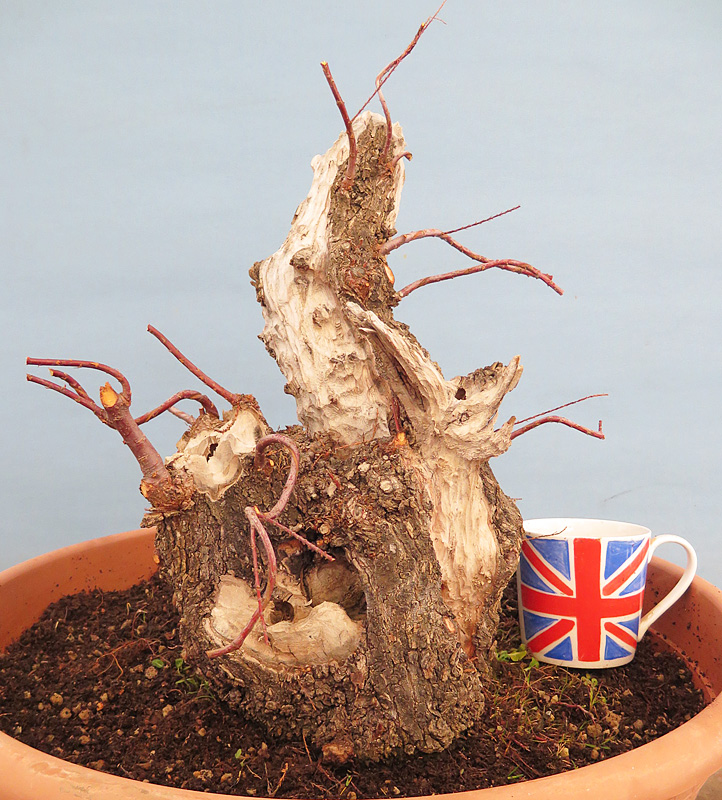
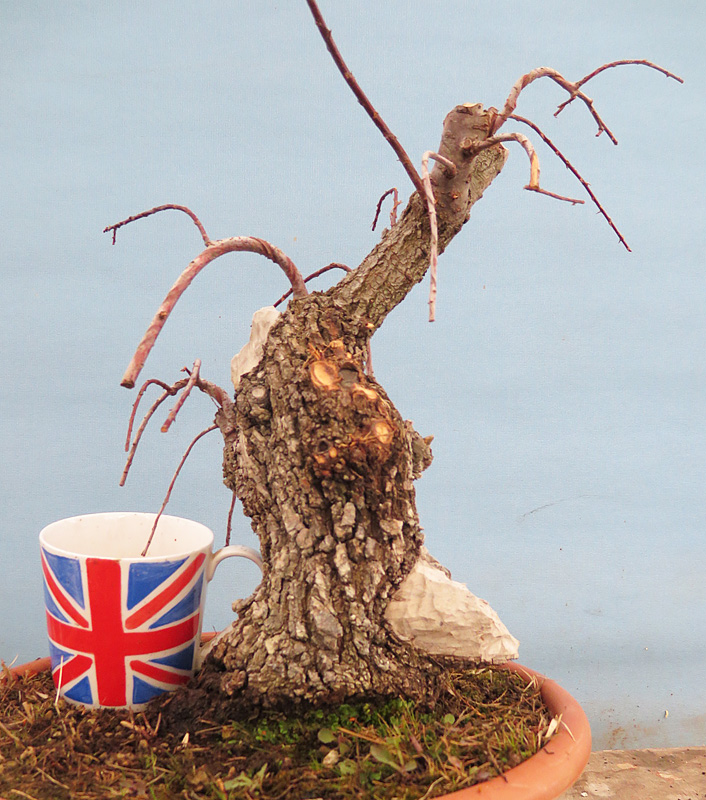
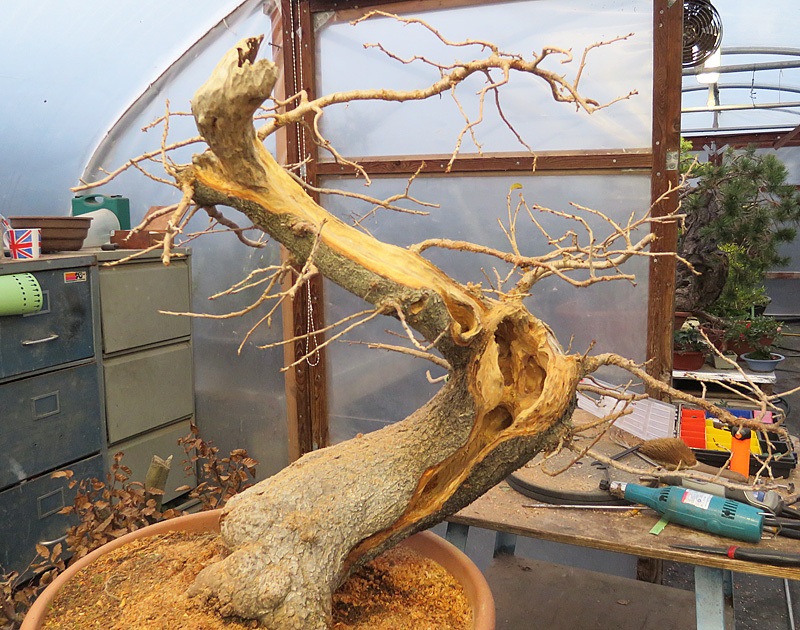
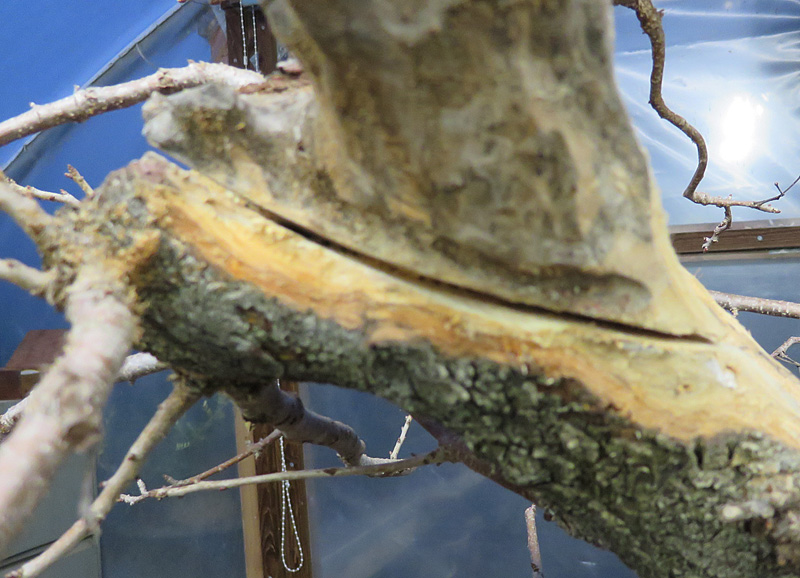
Late last year I took delivery of a large number of trees from a European supplier. This particular tree is a prunus mahaleb, a superb variety entirely brilliant for training as bonsai in Britain as it’s ability to withstand shit weather and abuse is legendary. Nothing seems to get the better of this brute other than a chip storm created by a bonsai guy with a Makita. I can’t blame the guy who worked this tree he’s just doing what he was told by his boss but I can’t say the work increased the commercial viability of the tree. The trouble is bonsai takes and age to produce and quality work takes time and that costs money which nobody want’s to part with. As a result we either get very beautiful and expensive Japanese bonsai or this sort of ‘rough’ stump work. Having parted with my hard earned in exchange for this bit of badness it became very obvious i was going to have to dig deep in order to salvage what was left and I wouldn’t be taking home a pay check that week.
As it arrived, to say i was disappointed would be an understatement. Look closely!
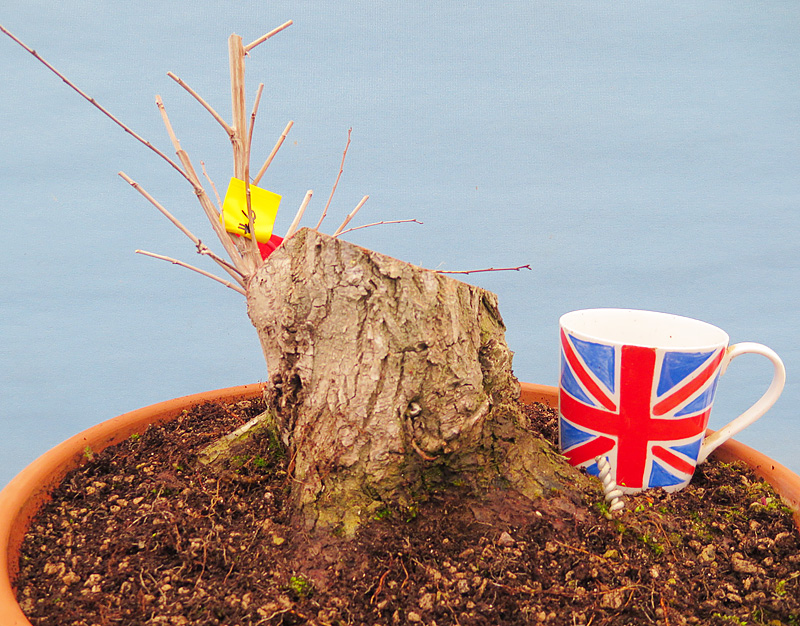
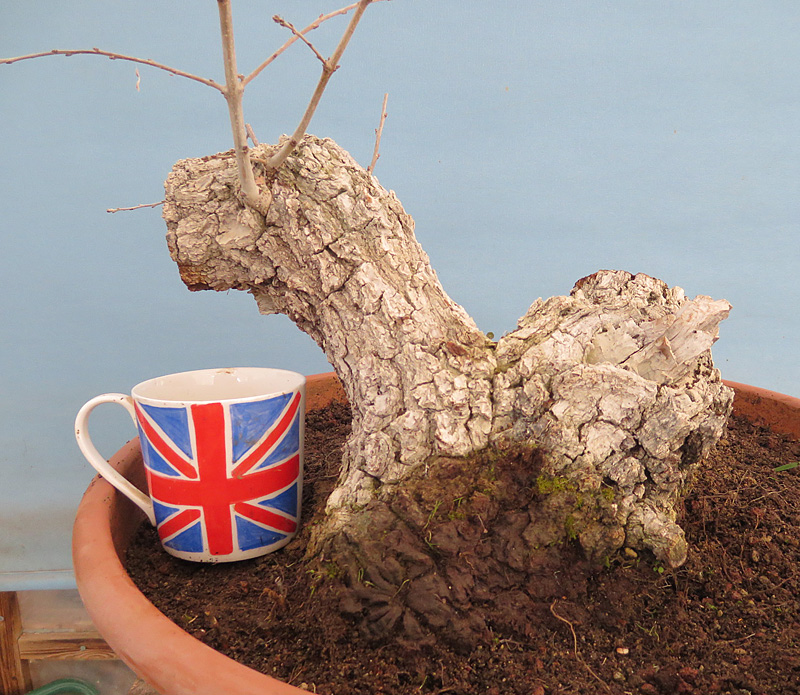
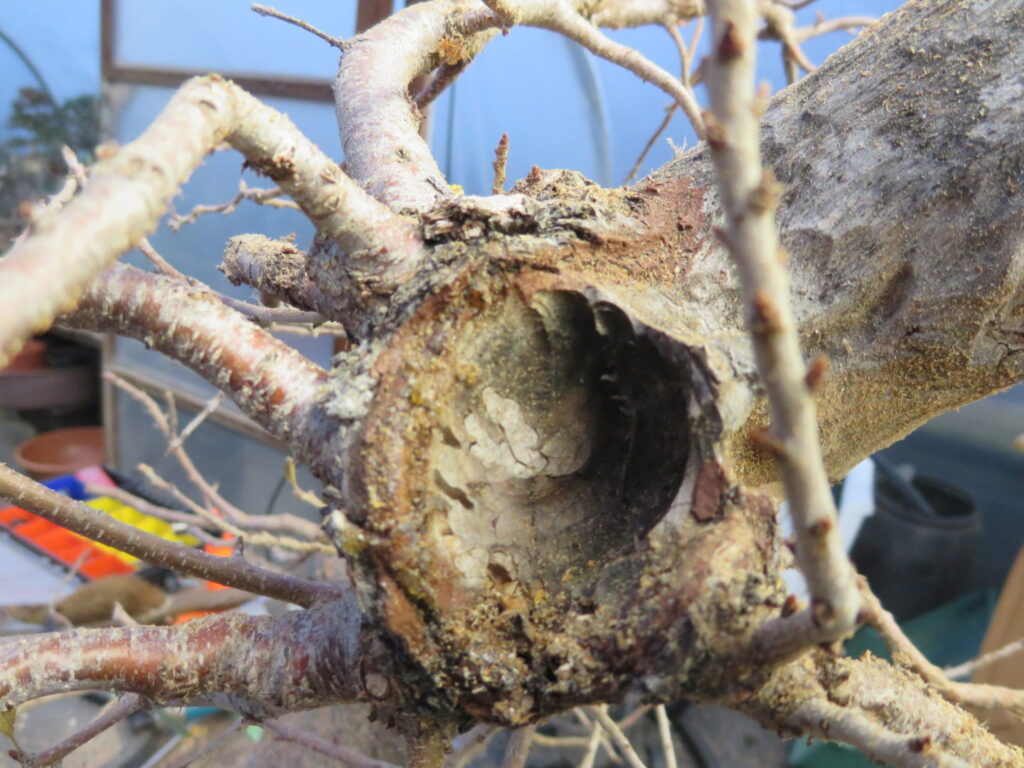
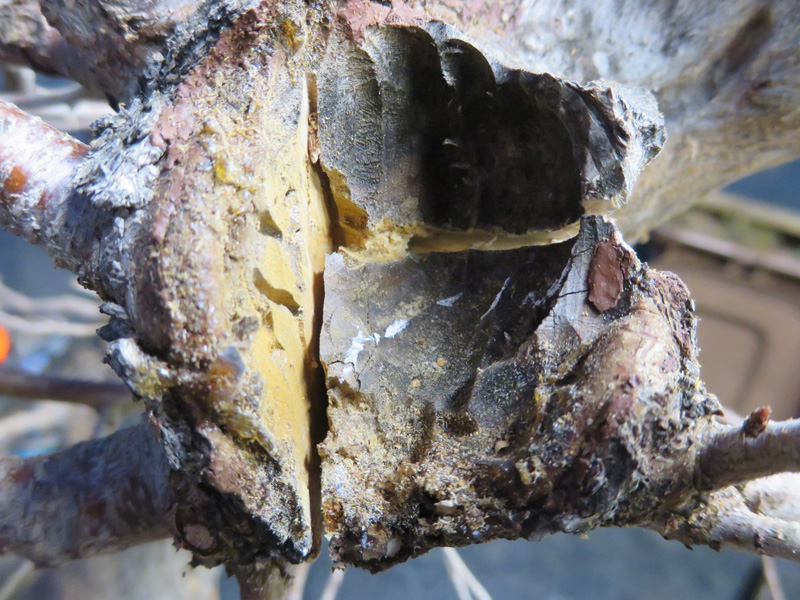
There have been some stumps that have obviously been chewed out around the half way line. A straight line was run up the second half of the trunk where a big ugly lump was left. Several bits of poor technique with little hope of reconciling the whole. That’s the trouble with this type of hastily conceived work it often leaves us with worse problems than if it had not been done at all. The only way to progress is to build the tree one small step at a time. Piece by piece we can try to absorb the ugly and with patience, hopefully, we can heal the tree then, over time, as the tree grows and develops all can be well, if we’re lucky.
The first thing to hate is the haphazard ramblings of a carving tool. NEVER put a carving tool on a tree unless you are entirely aware of what it is you want to make. The inherent nature of a carving bit is to tear everything to pieces, just ‘following the tool’ will wreck your tree and everyone will instantly know it took two tools to make that mess. With a really big tree like this prunus you have a great opportunity to do something good. That trunk is a foot thick, carving a half inch up the front looks lazy, ill conceived amateurish and on a good day, SHIT. Carving has to belong to a tree, not look like we did it with a magic marker. Carving a big trunk and achieving a deep well connected and beautifully shaped hollow takes a lot of time, a lot of tools and a lot of skill and if it’s done right nobody will suspect it’s not natural, at least not after a few years. That type of work is all about light and shadows and making that work means some deep holes. From the half way point downwards the trunk is now entirely hollow and light breaks through in several places and all told that took about eight hours and filled my industrial vacuum cleaners bin three times.
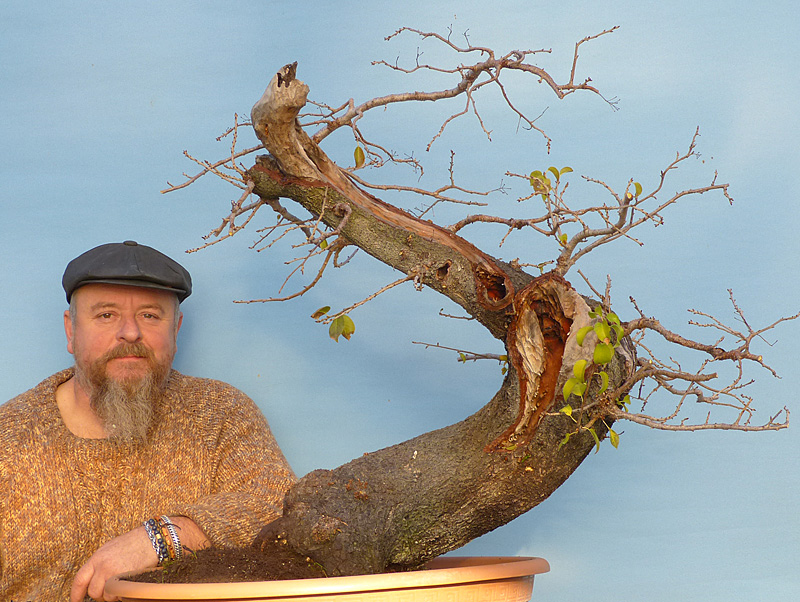
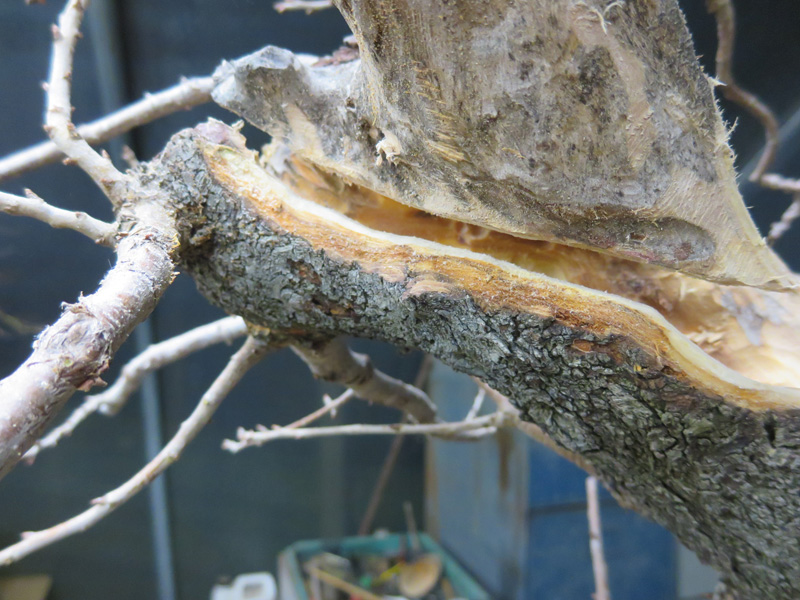
The lower half of the trunk conceals most of the work completed here but in the flesh it bings a little fizz to the tree.
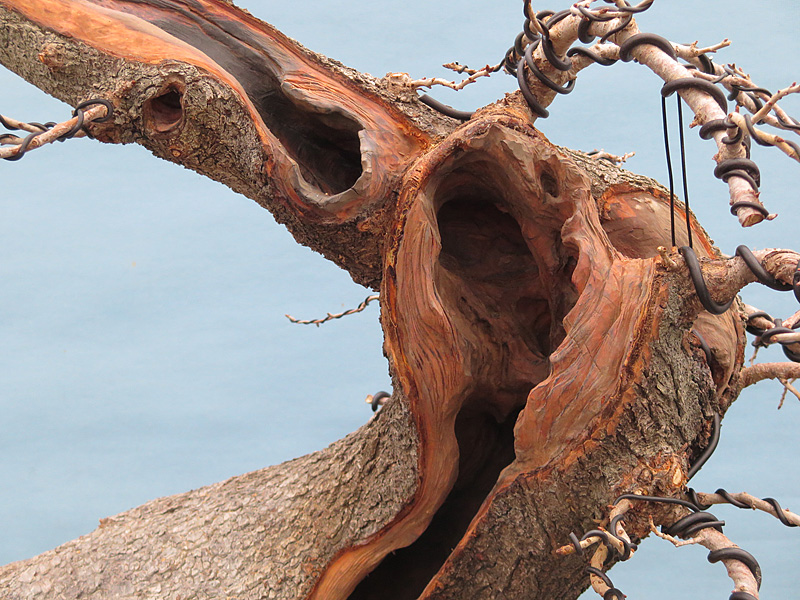
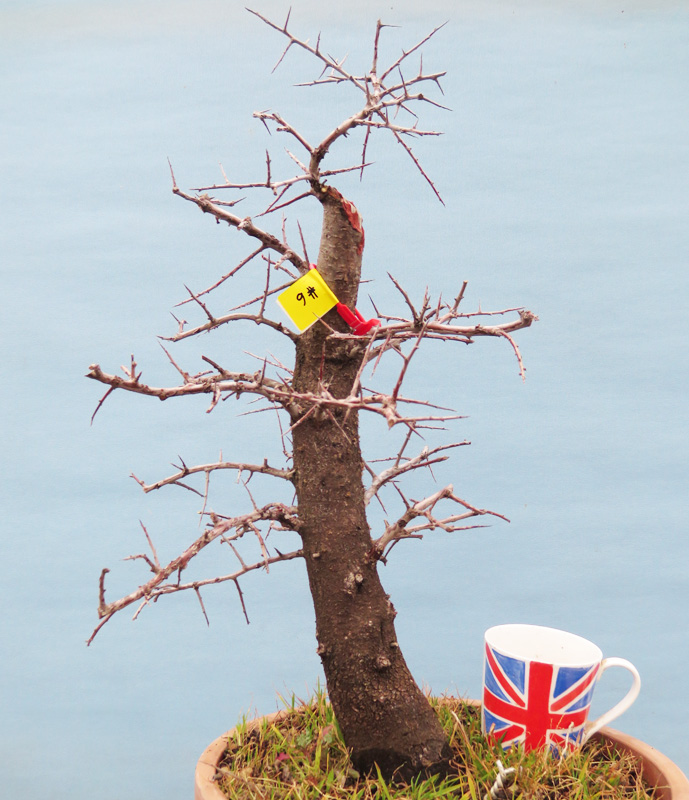
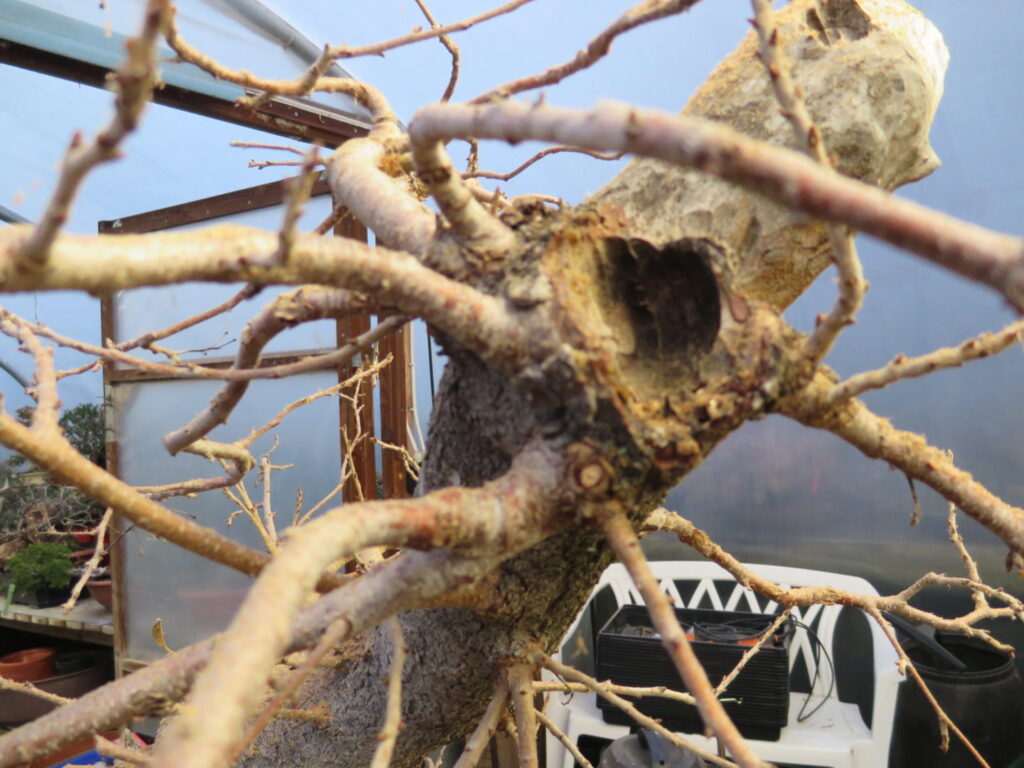
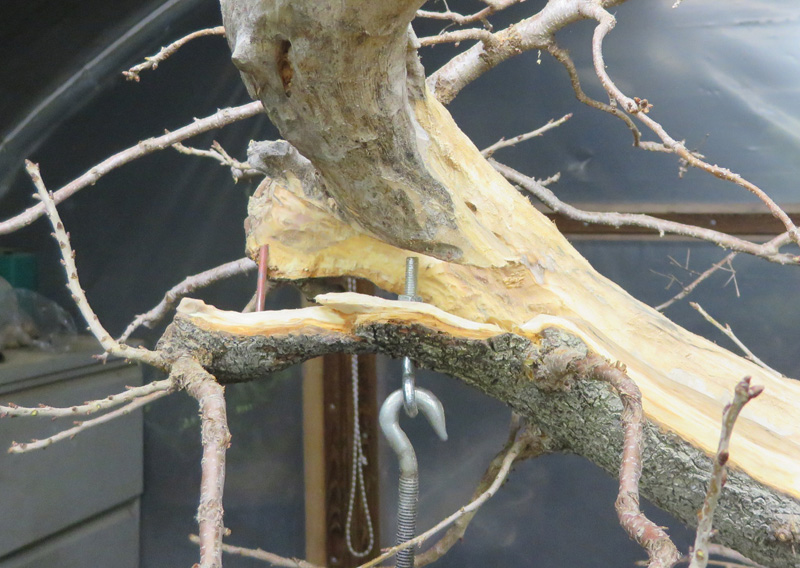
Sadly there was nothing i could do with that long straight piece in the upper part, there was nothing left for me to use so all I could do was lighten it up and clean it nicely. At the top we have that ugly knuckle and that can be fixed. However due to some suspect material preparation in the past there’s a whole ‘Medusa’ thing going on behind that ugly fat slug of wood. Everything’s in the wrong place and the ugly’s knee deep.
Carving, that’ll help.
This chalk line’ll fix it.
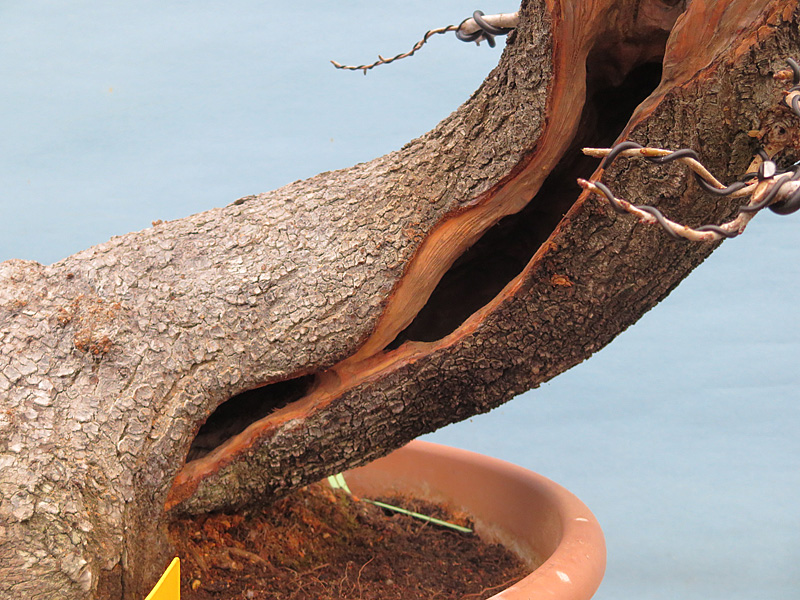
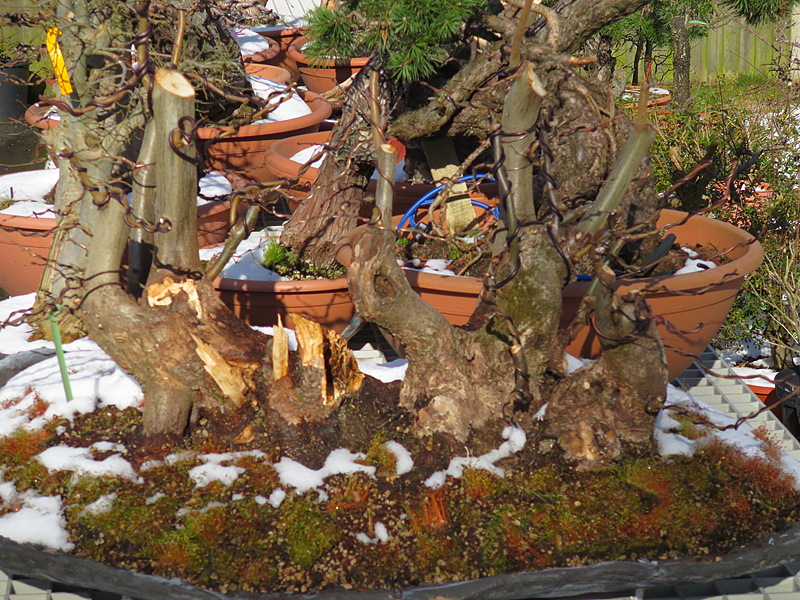
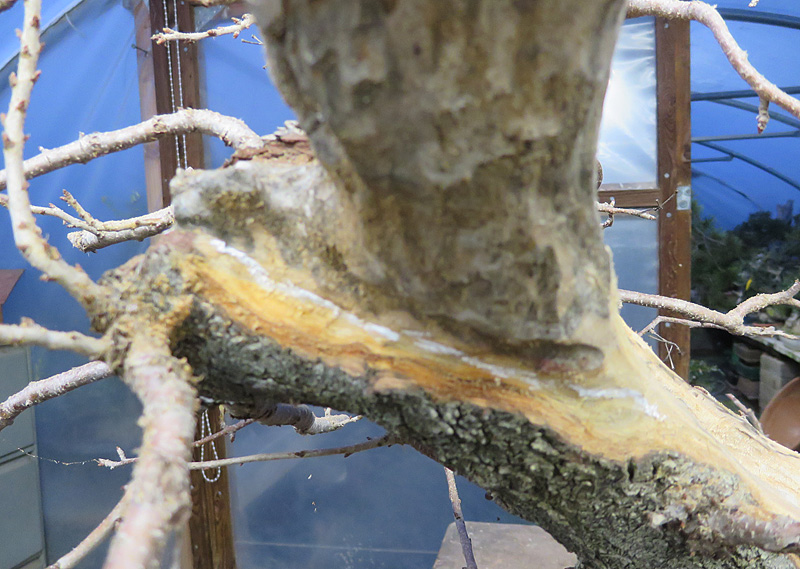
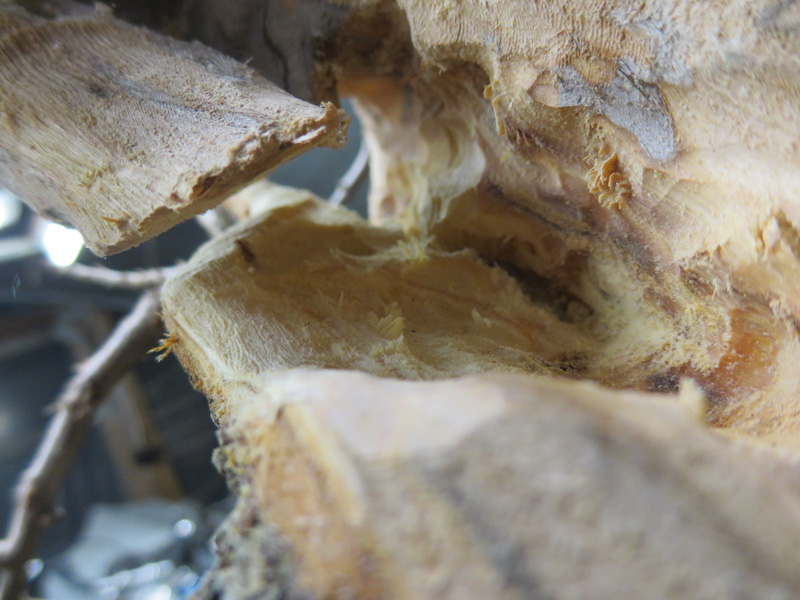
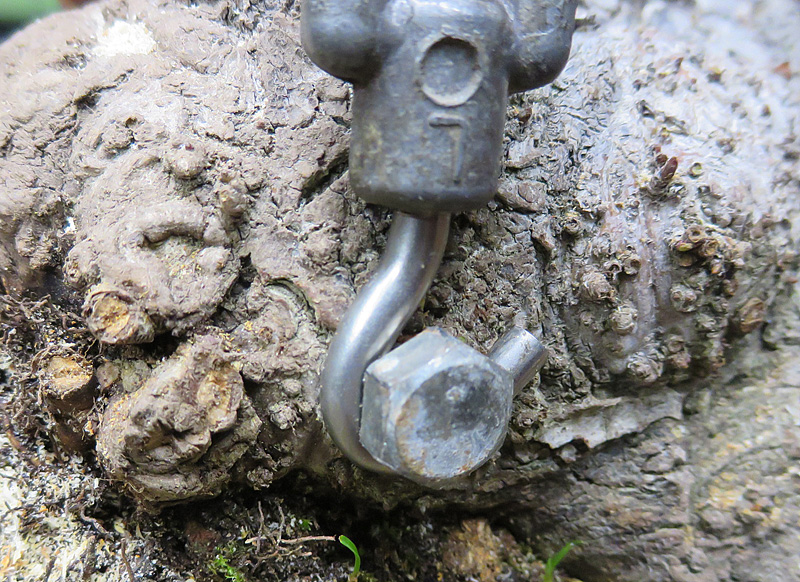
Splitting this bit off the main trunk enables us to improve the movement and taper. It’s not much but it’ll help.
With the saw cuts in place I just have to remove the inner wood before pulling that lower corner into place.
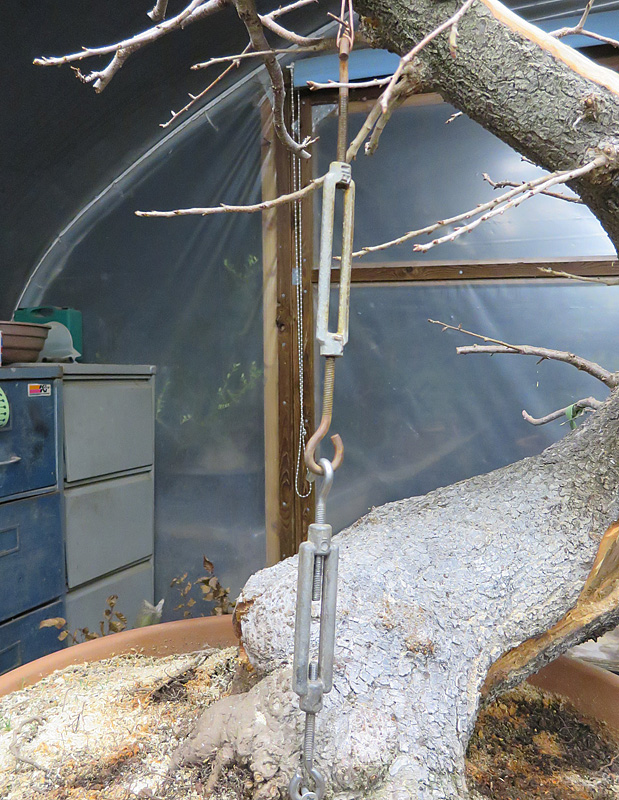
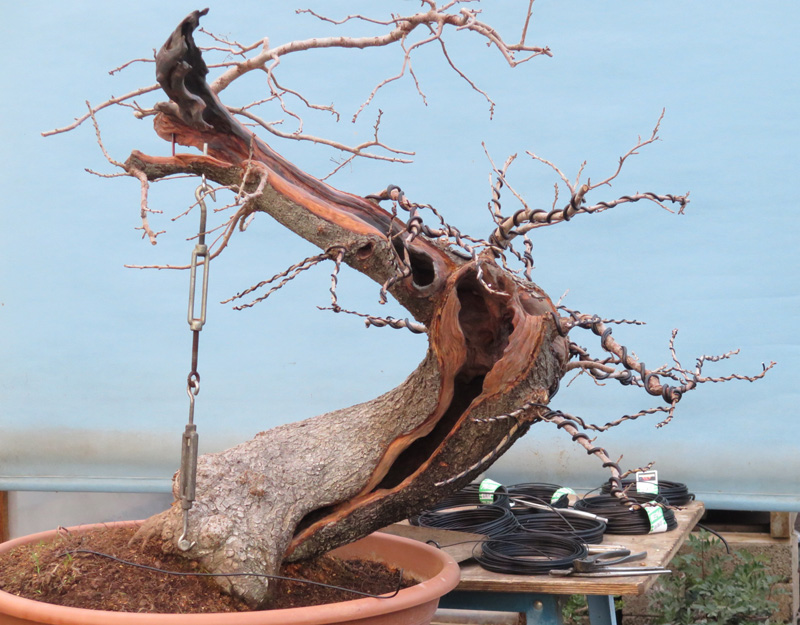
Two turnbuckles gives us a nice long pull
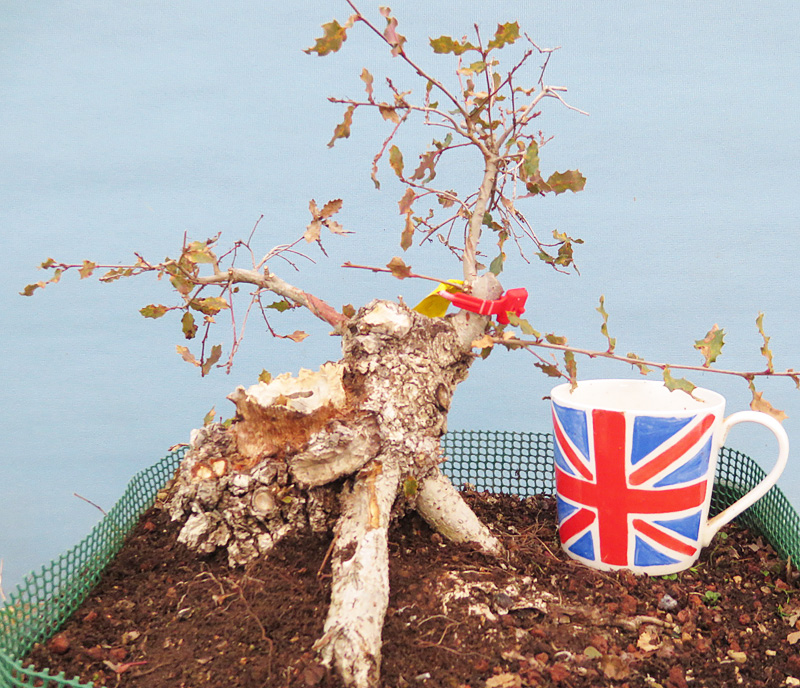
It took a while to set this up but once the live bit was pulled away from the main trunk I was free to get rid of a bunch of superfluous wood. I thinned out the banana at the top before going off sick for a month from the strain. I still think that lump needs work but will see how it goes. With some ugly wire and a bit of rough texturing on the surface wood i think this tree is showing a little more promise than it did. Hopefully a summers growth will heal it further. For sure I will never see my two days work come back to me but that’s compensated for by the warm fuzzy feeling of having helped this tree back from the brink. After all we do this for the love of it, don’t we?
G.